
What is Ranging?
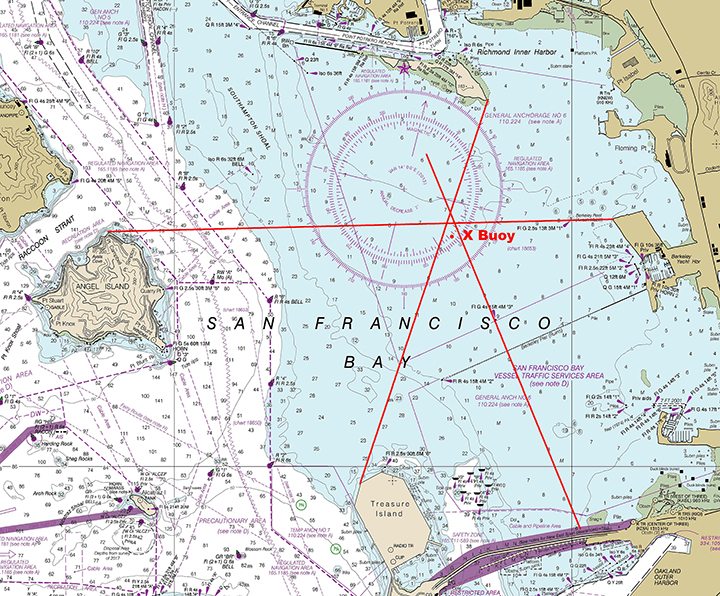
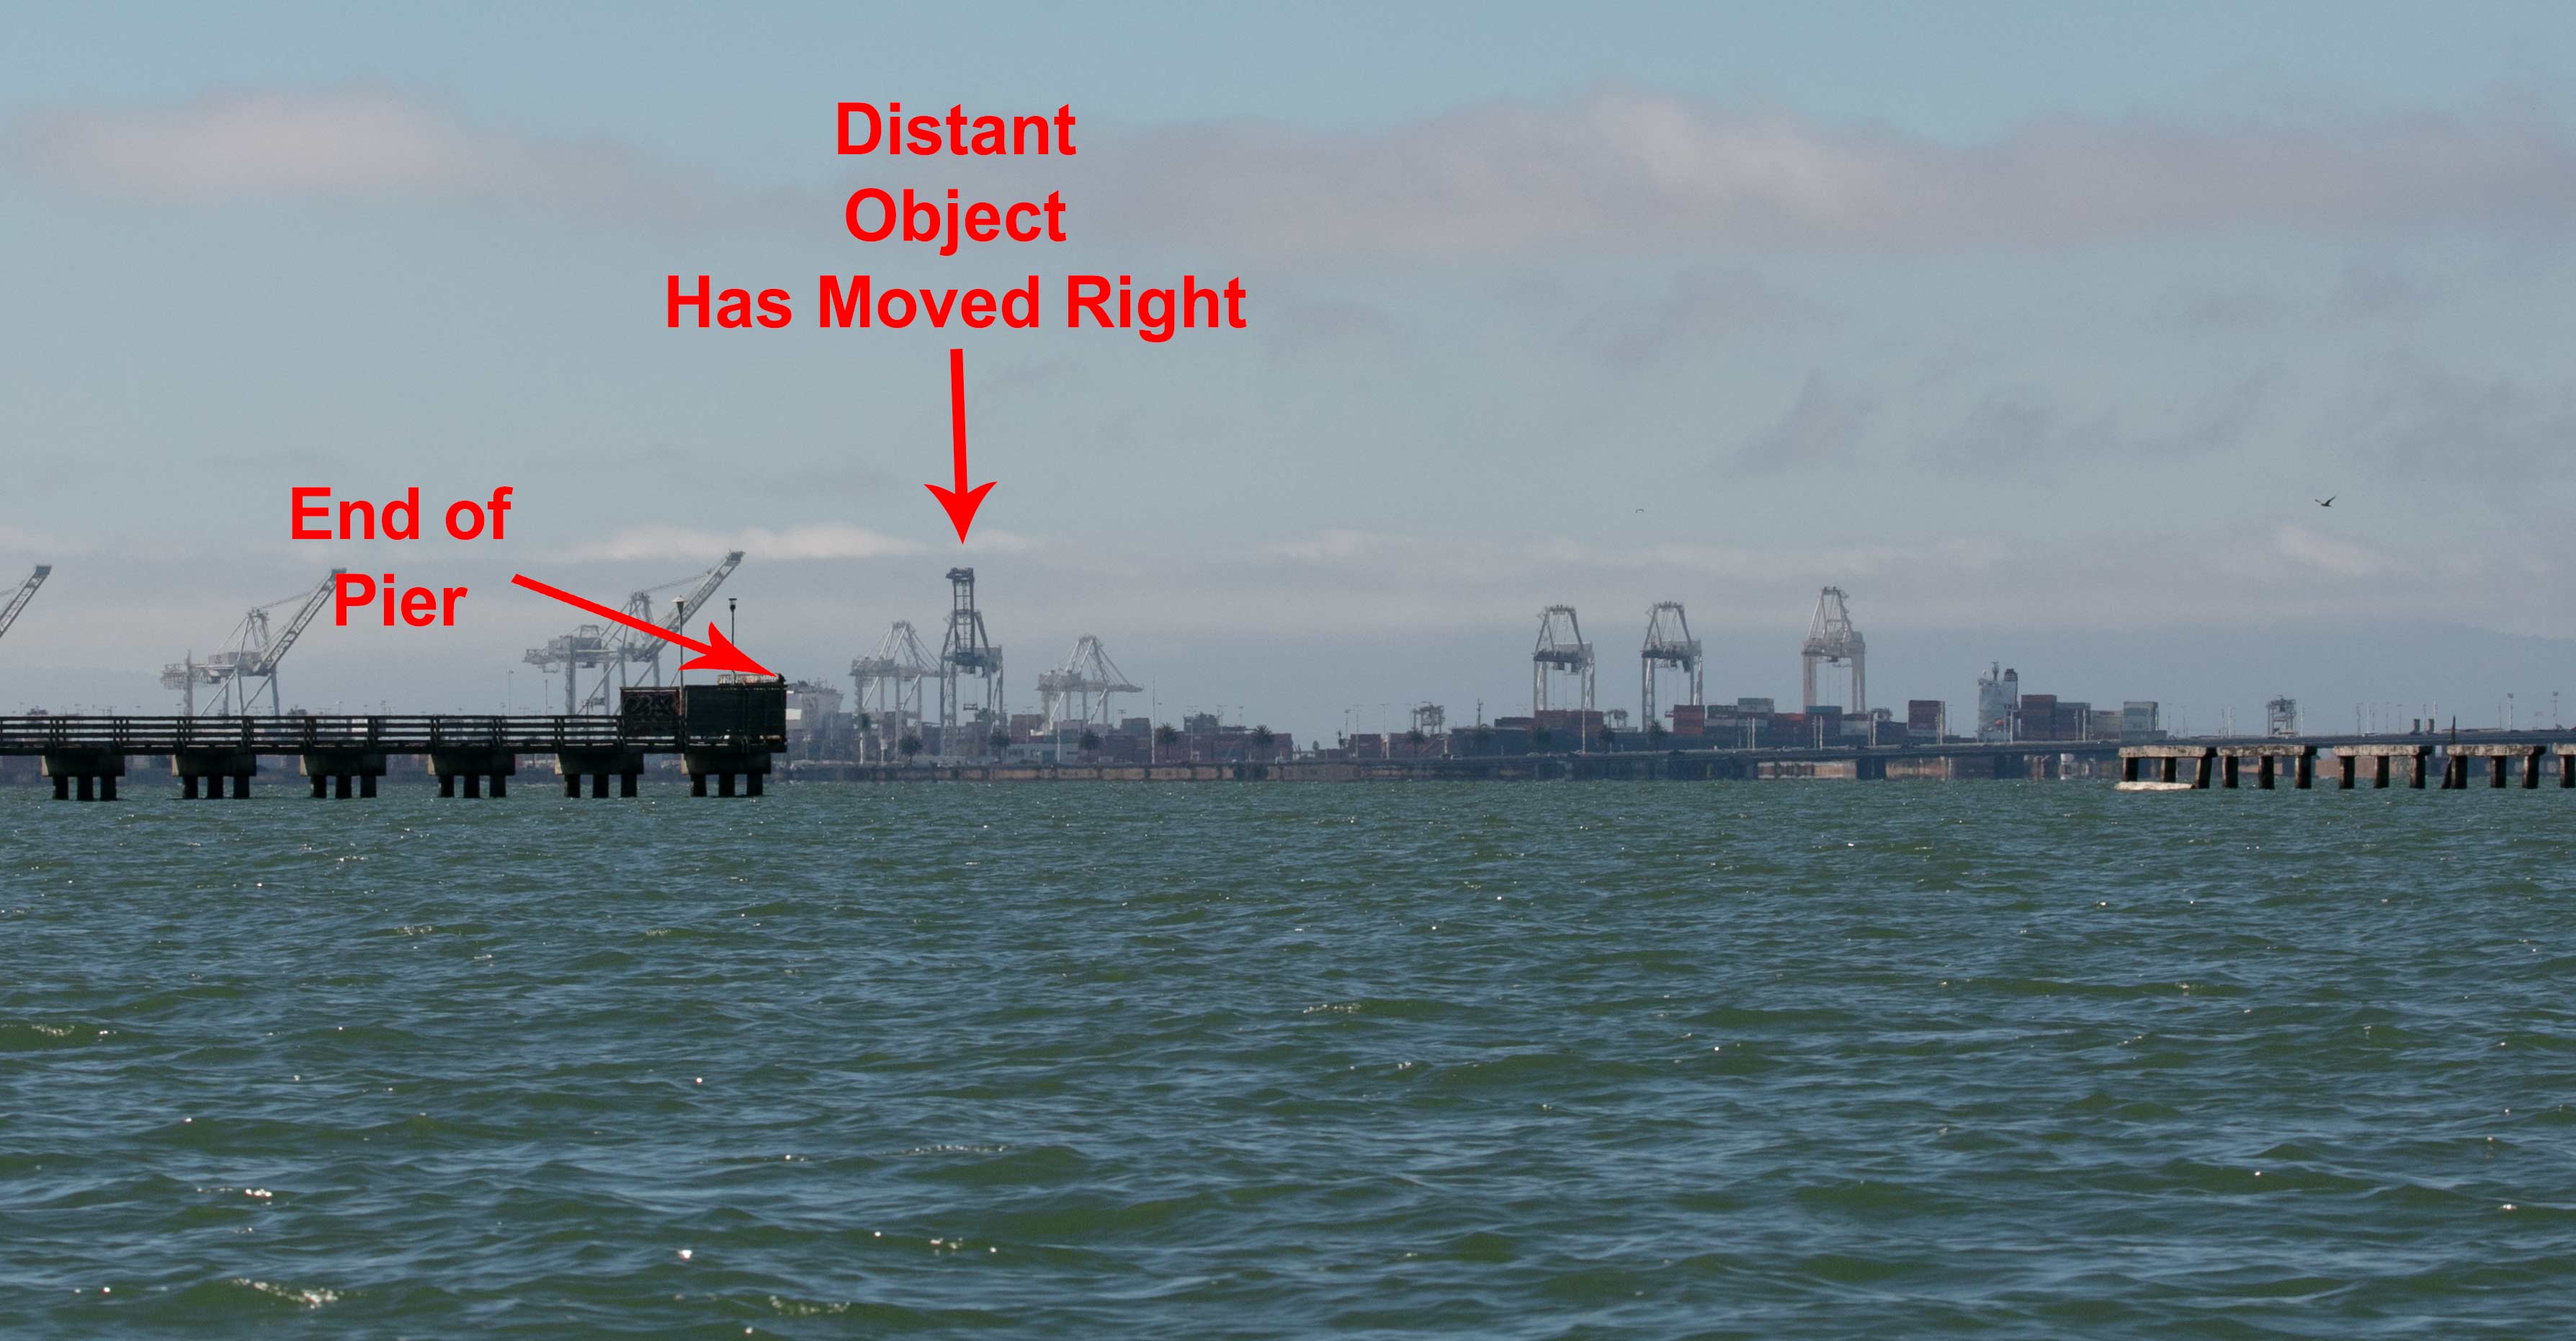
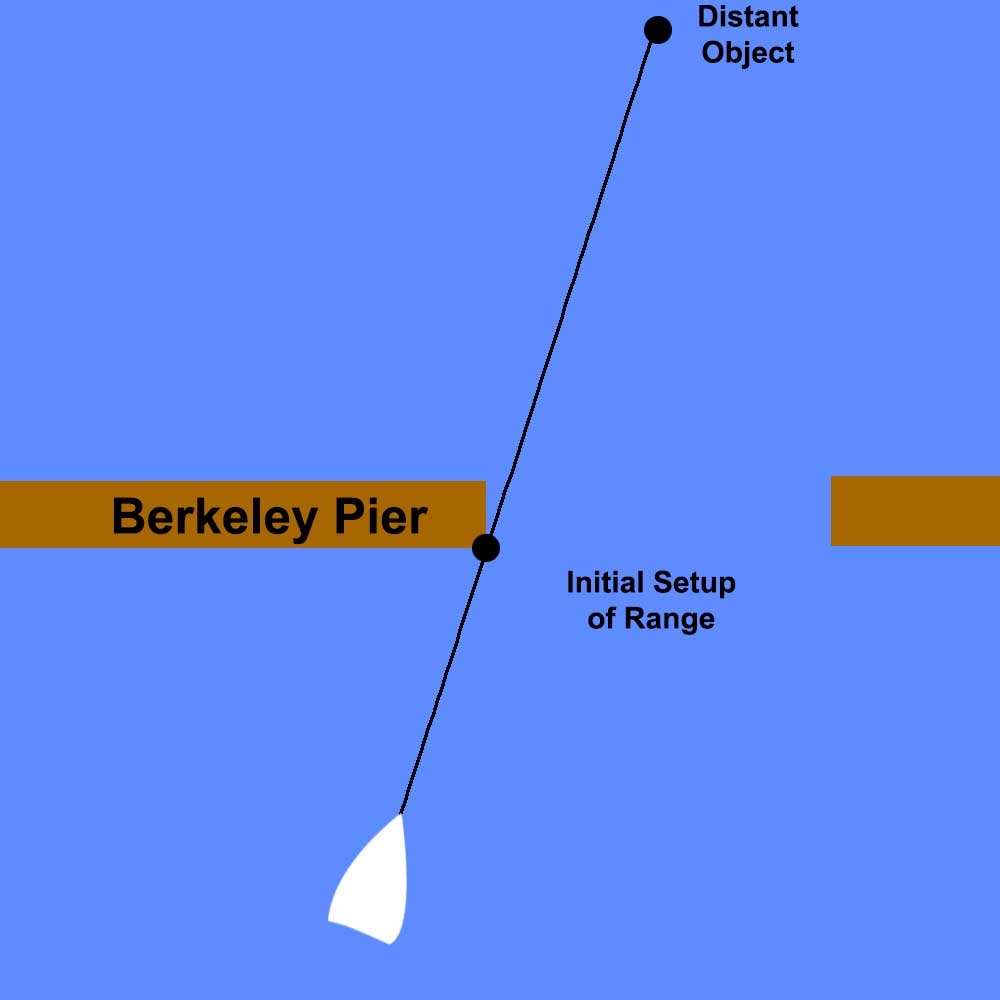
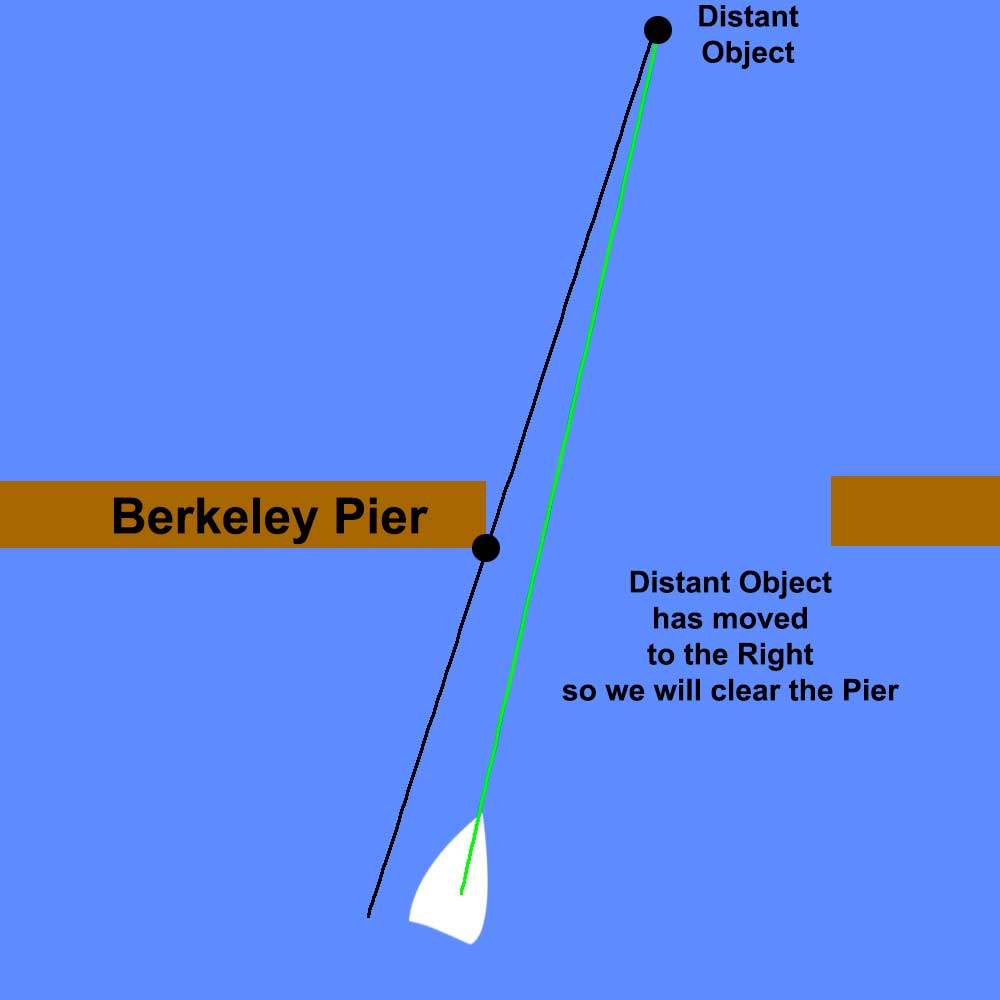
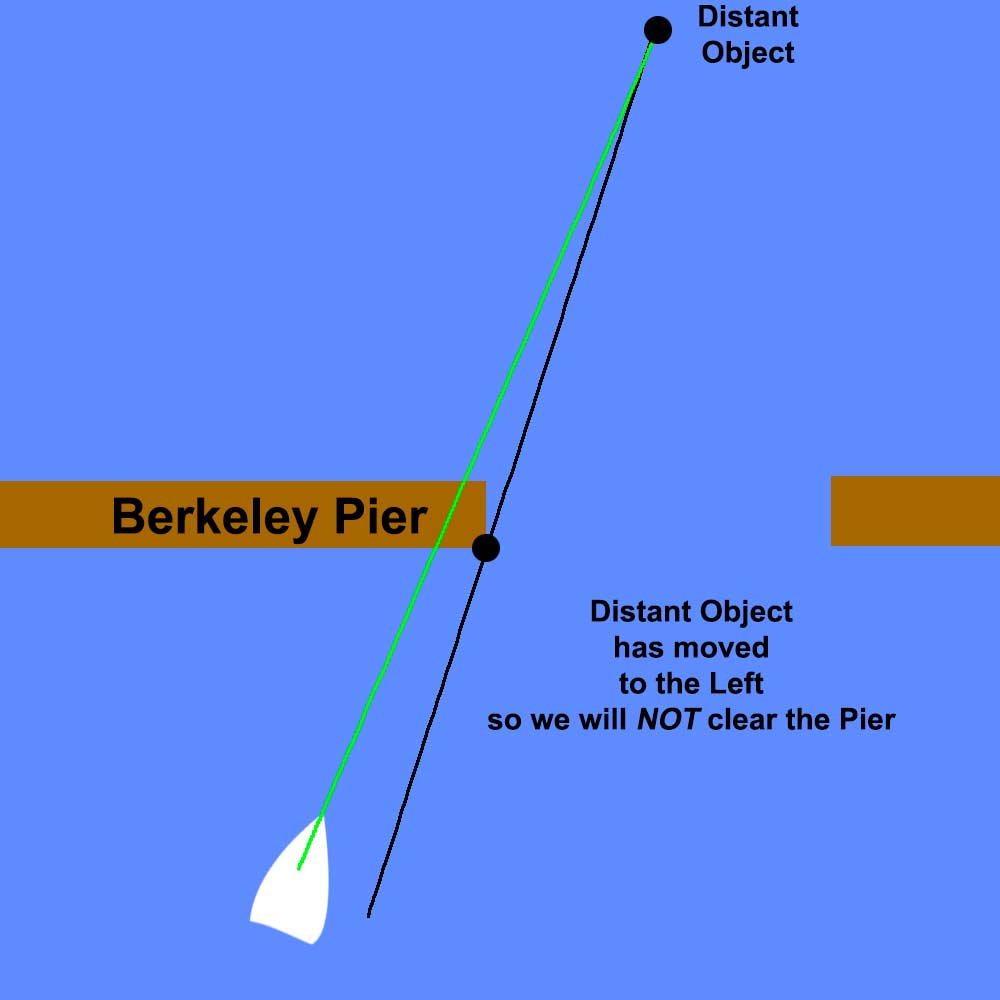
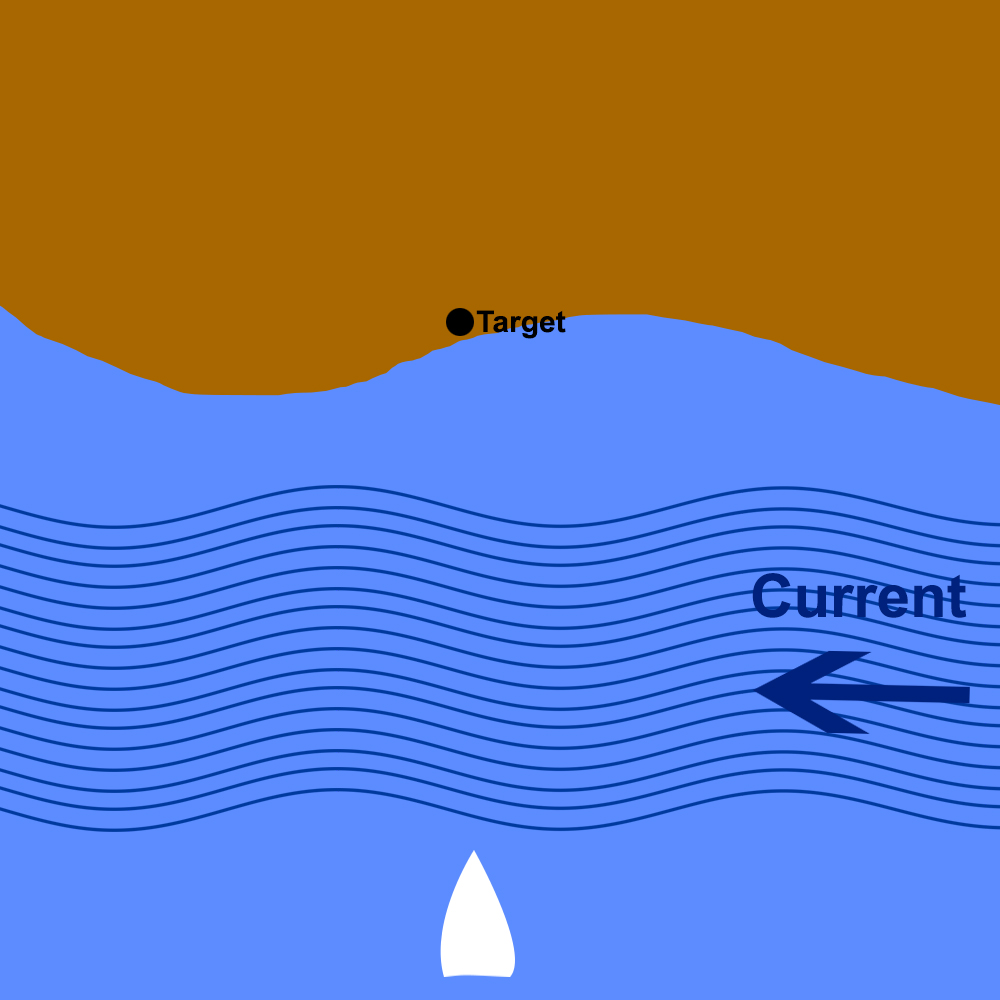
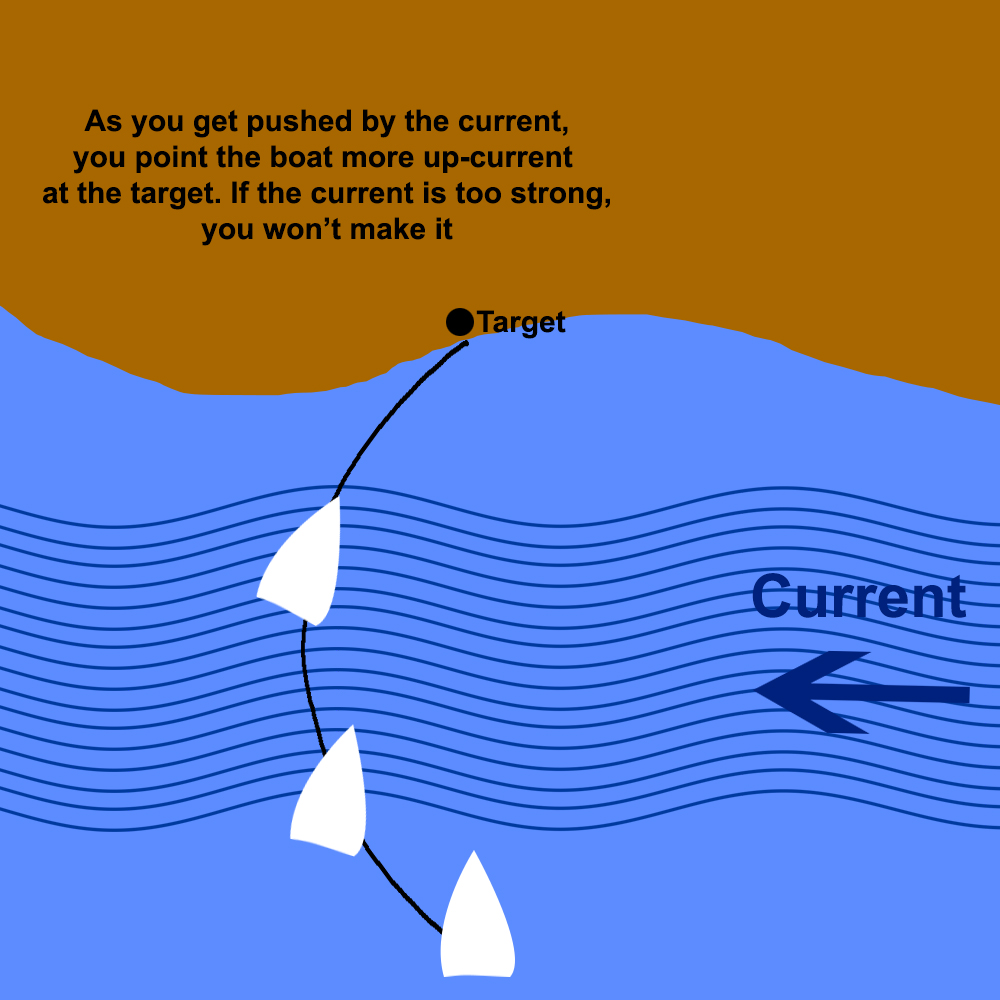
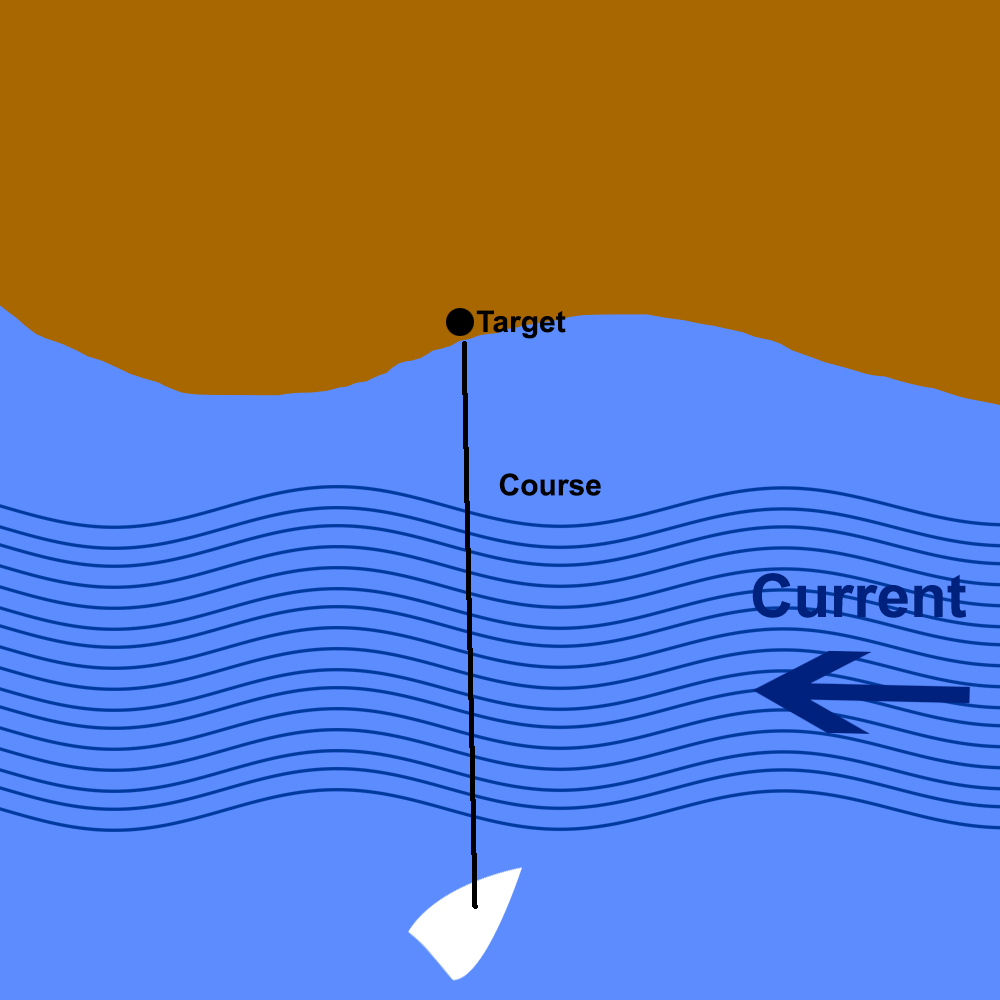
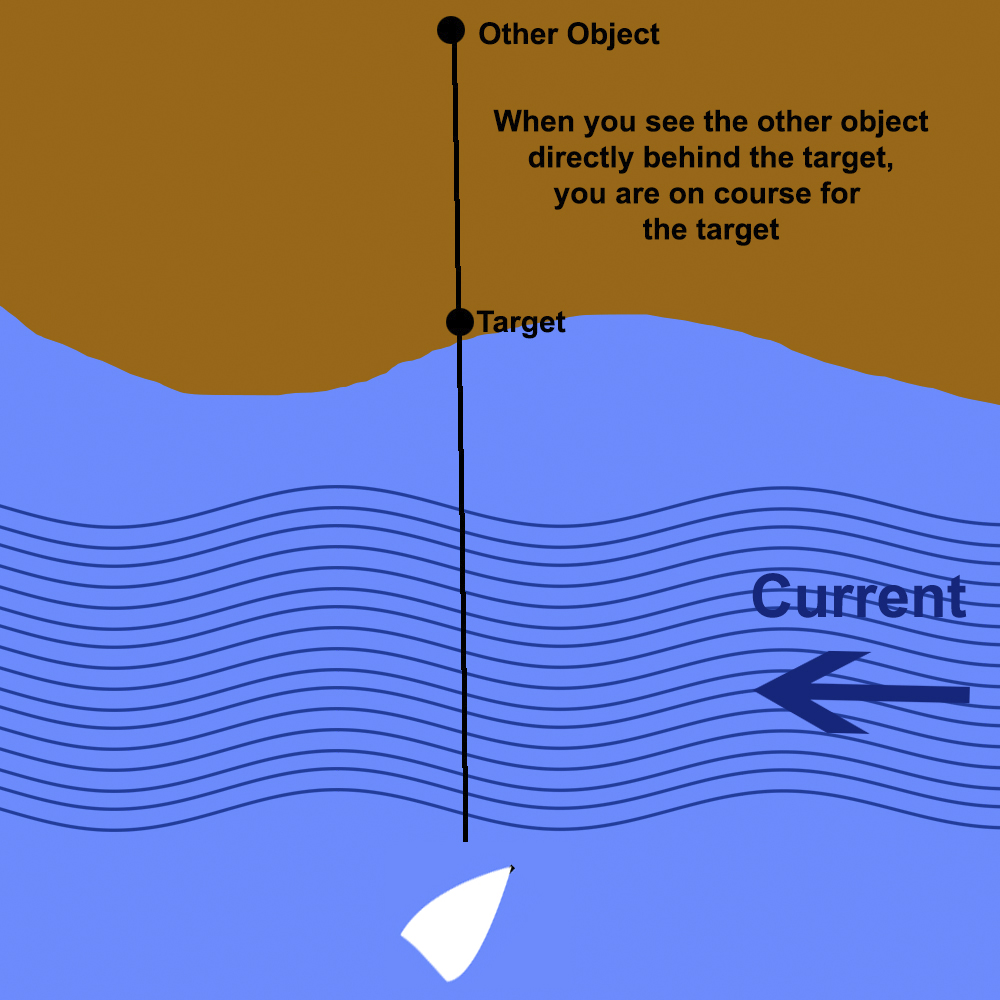
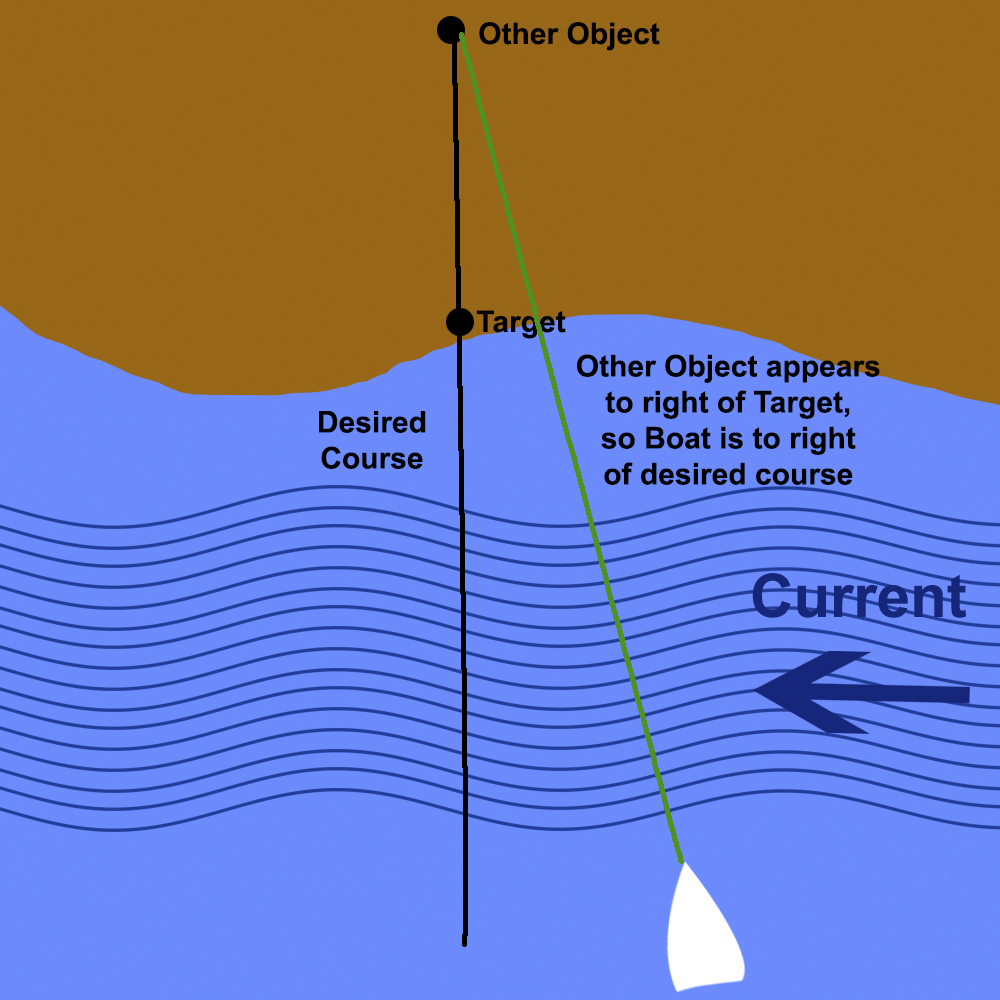
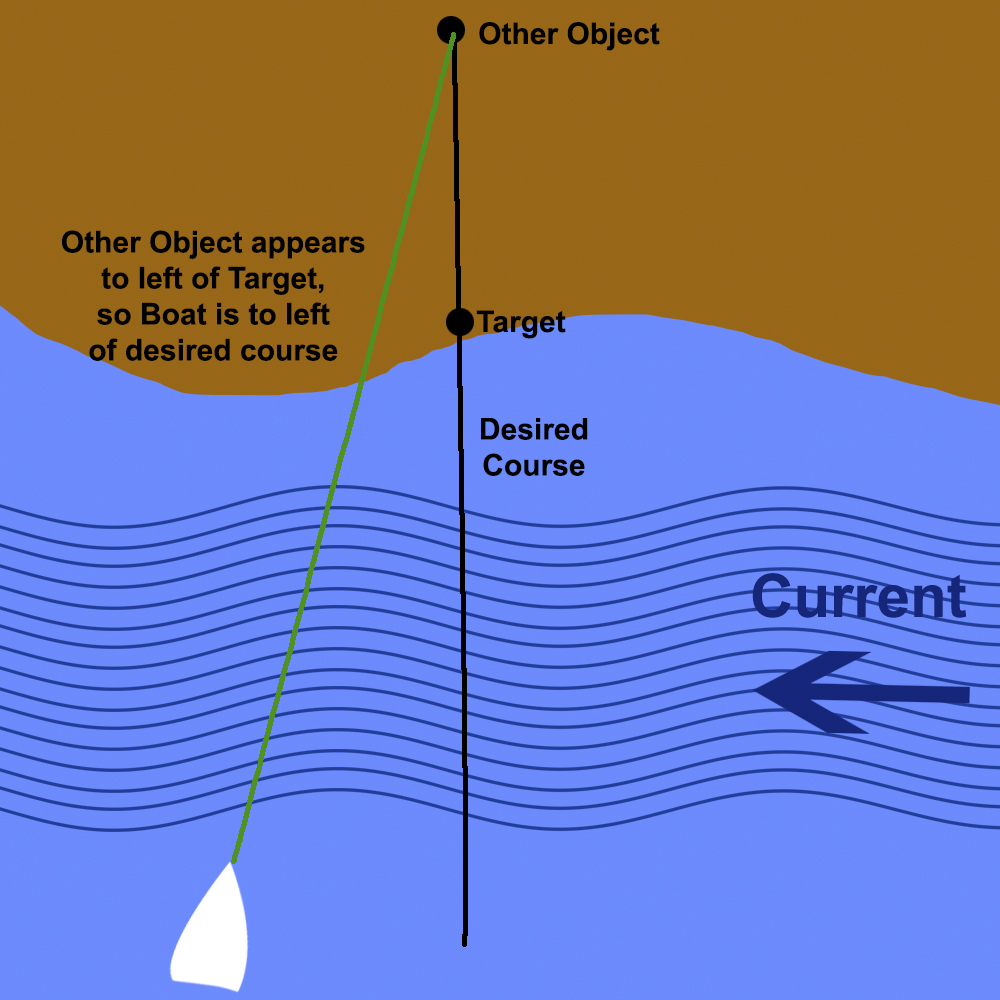
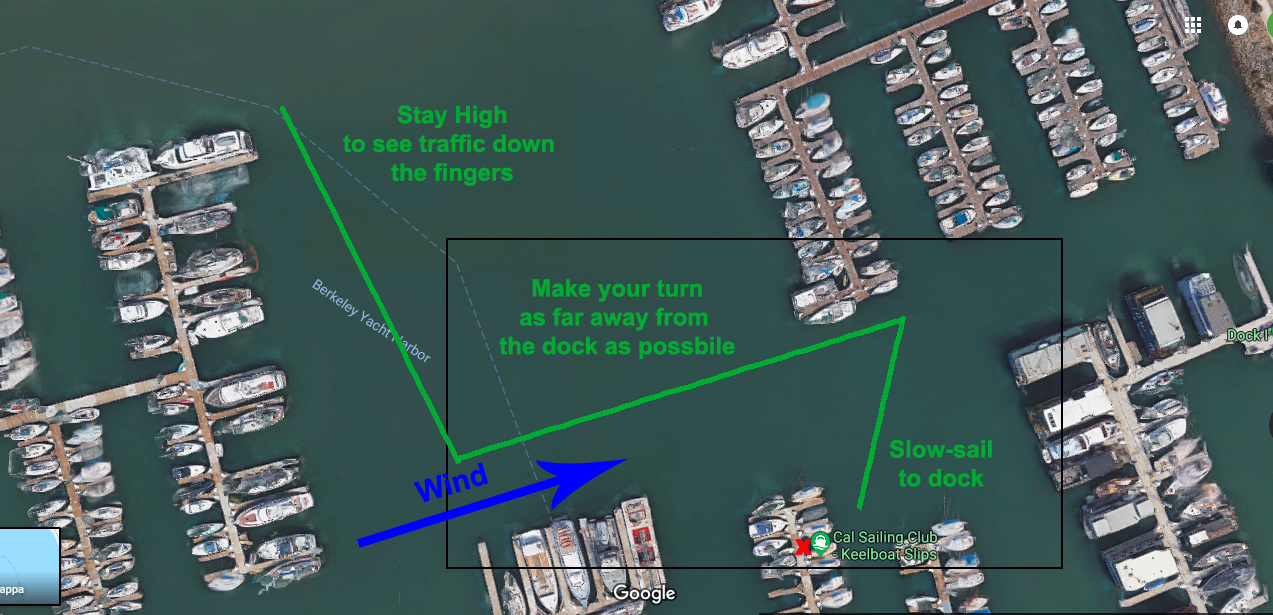
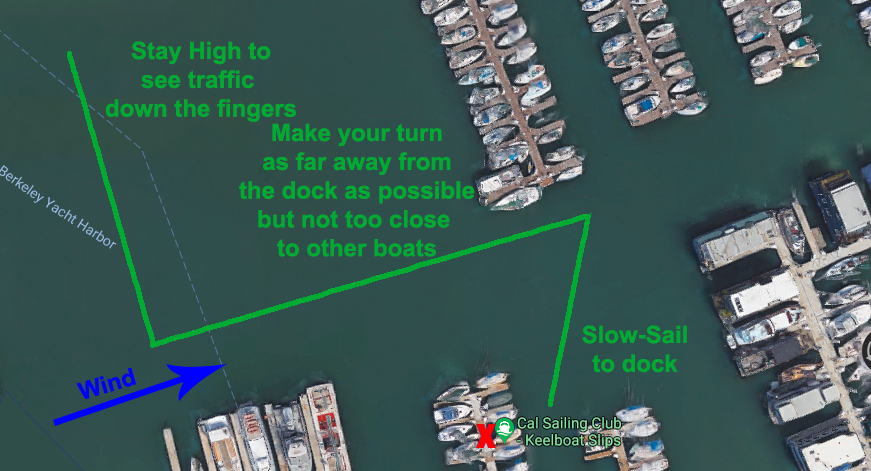
Ranging is a technique useful in all types of boating to determine whether you are sailing a straight course over ground or are being pushed one way or another (by leeway or current). It is also useful to tell you whether your current course will allow you to clear an object (get through the gap in the Berkeley Pier, say).
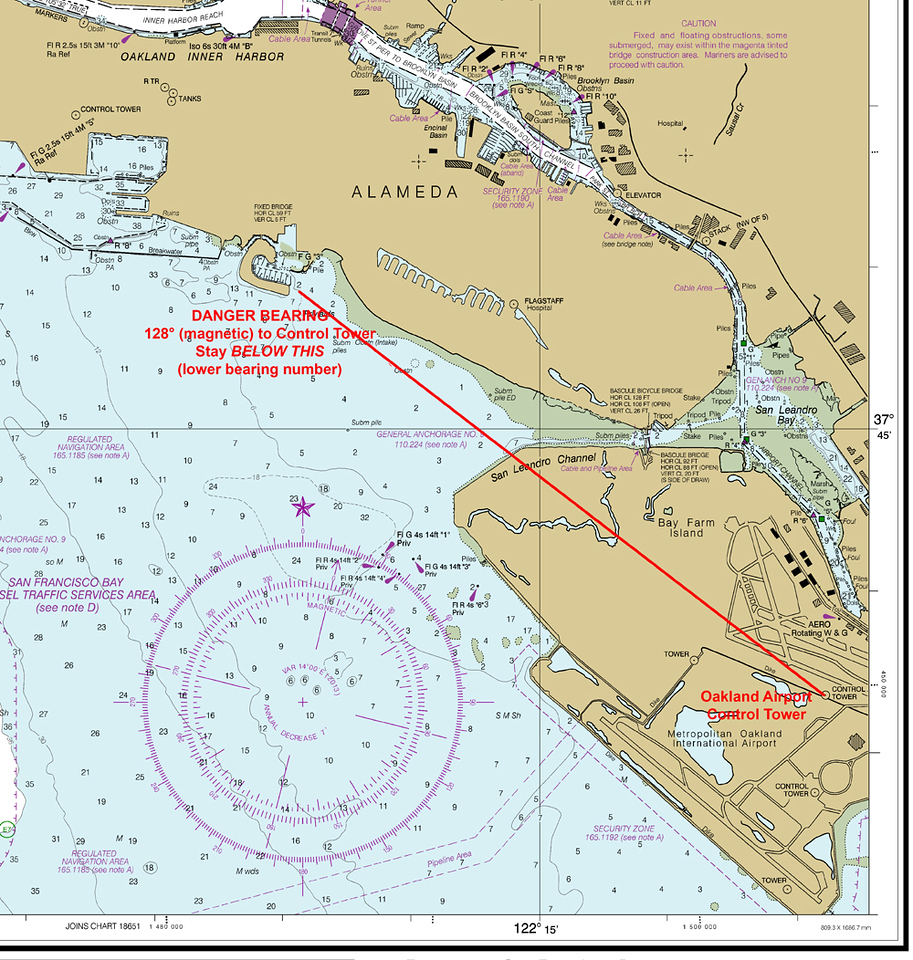
The basics are described in Part 1, which describes how to use it crossing a channel with current to maintain a straight course across. Part 2 shows ranging to determine whether you can clear an object, Part 3 shows how to use it to determine your position in certain cases. anmd Part 4 uses a variant to tell you whether you are on a collision course with another boat.
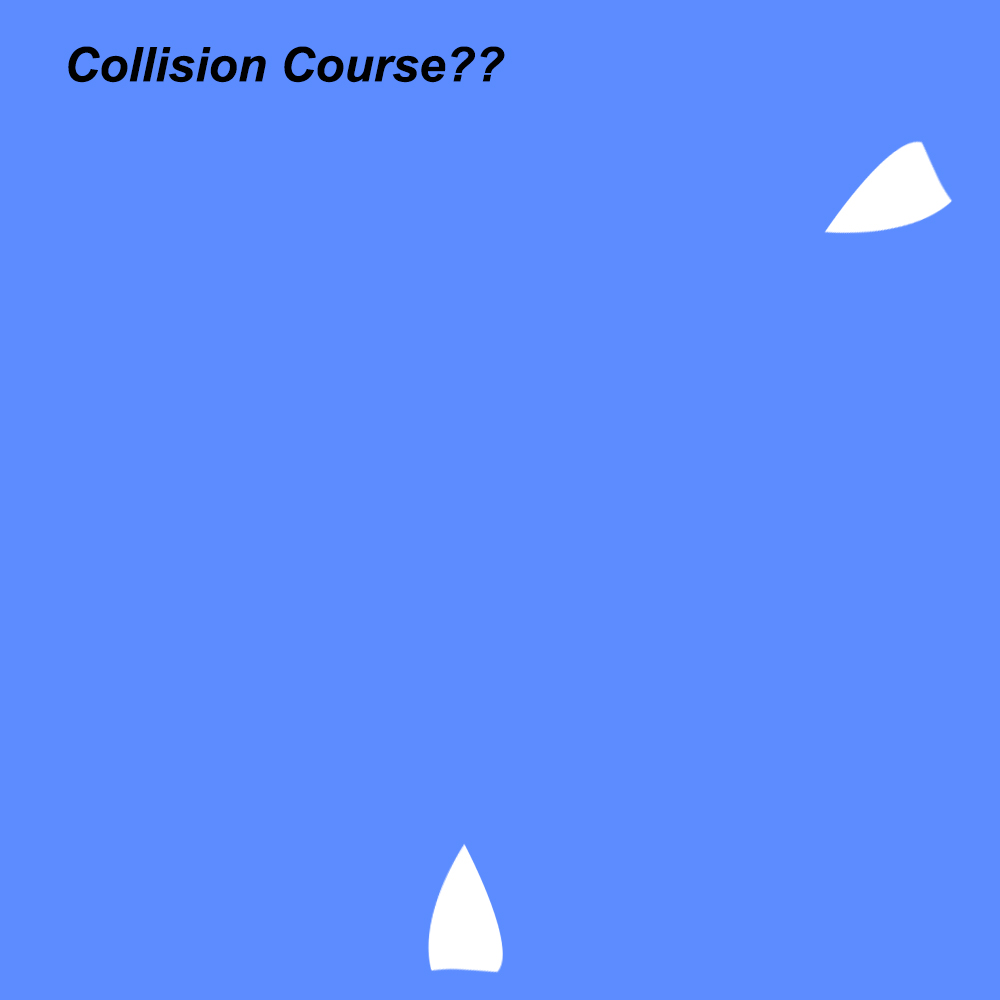
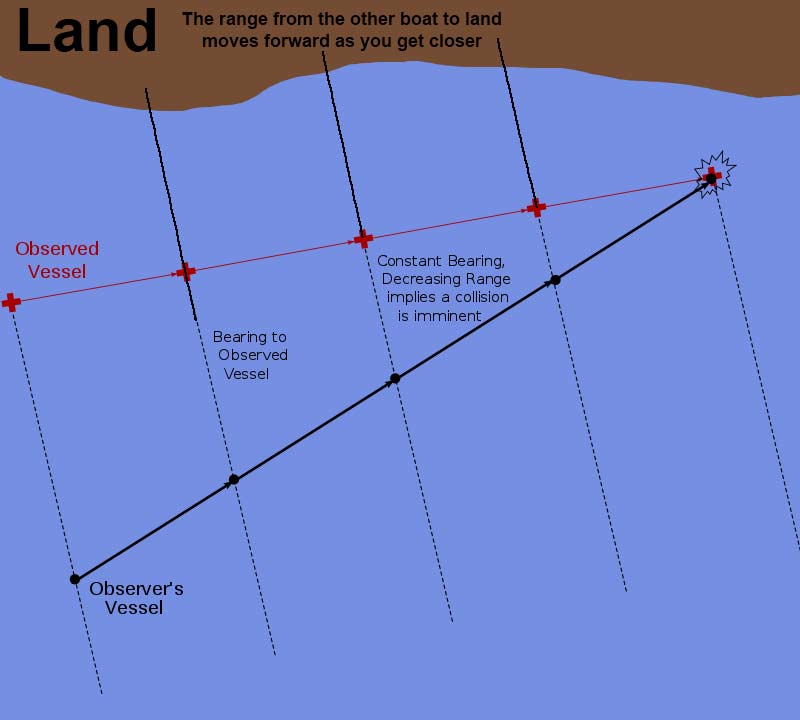
This time I will be controversial and show you why a technique sometimes taught at the Club to determine collision courses using a sort of ranging does not work.
What We Learned Last Time
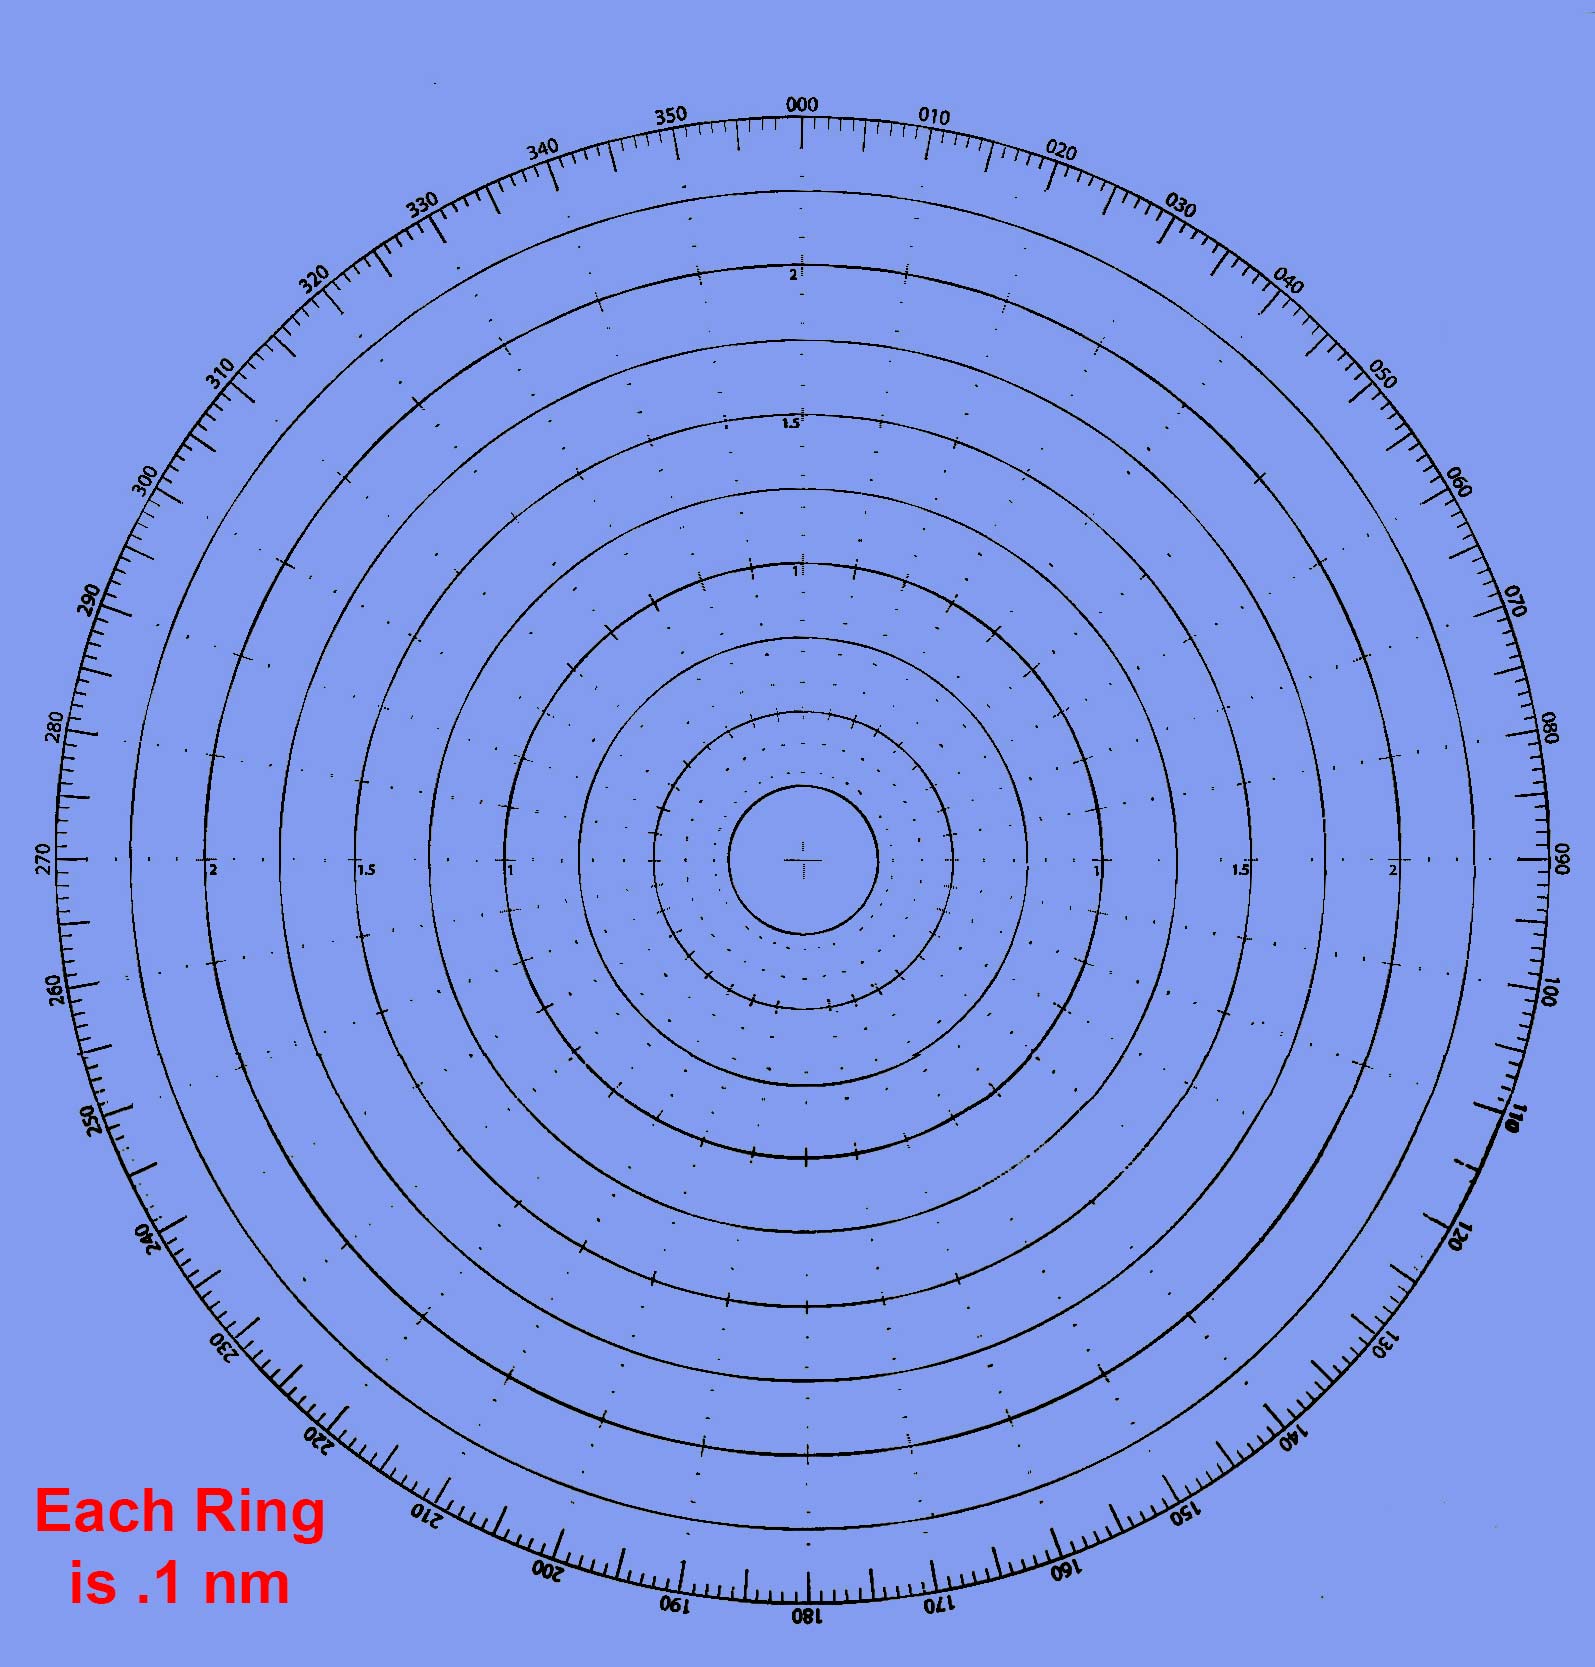
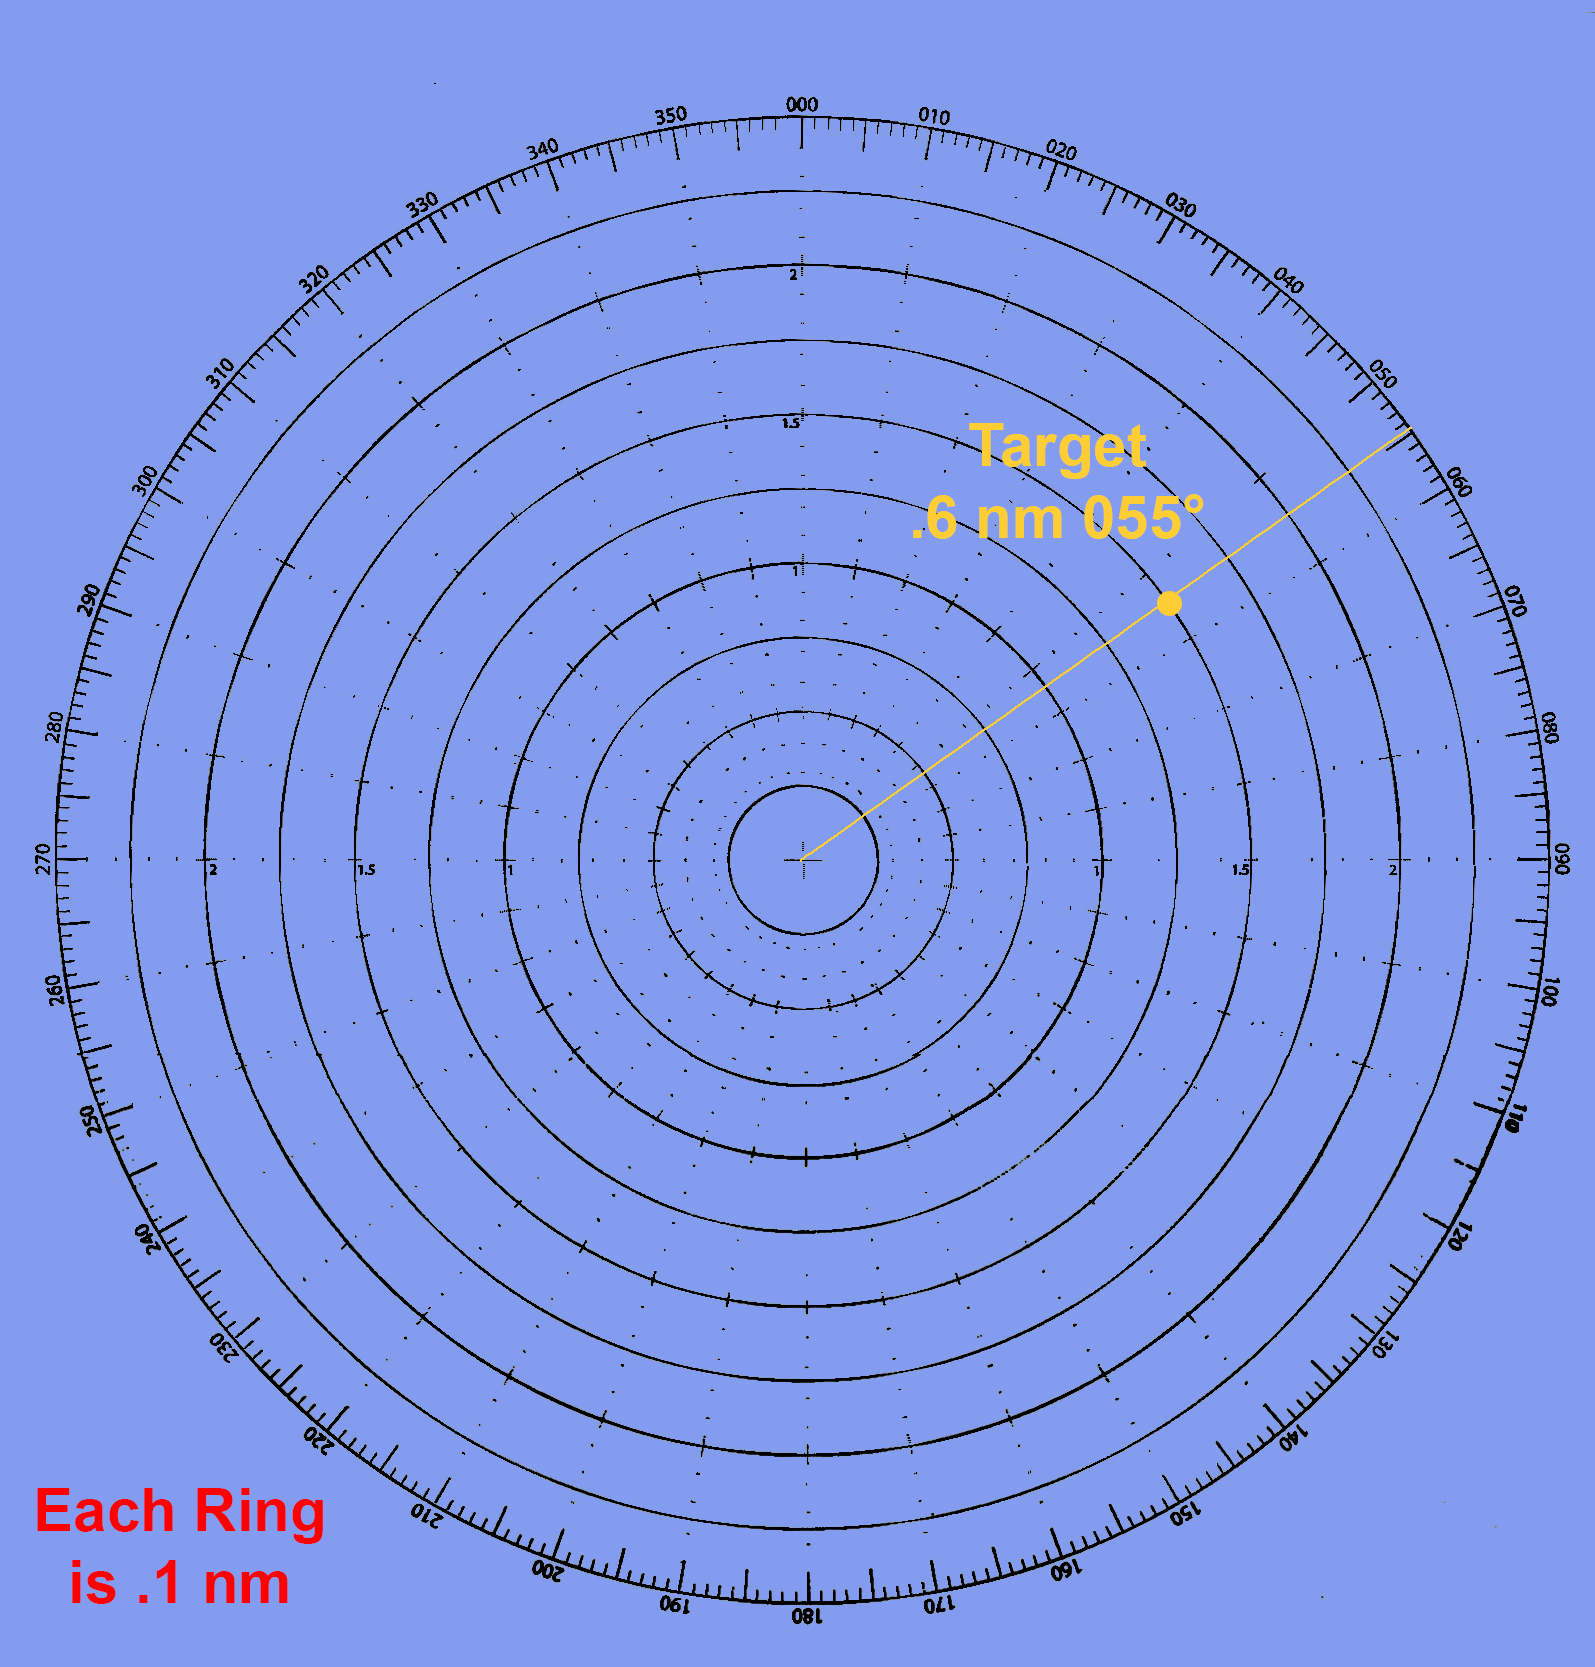
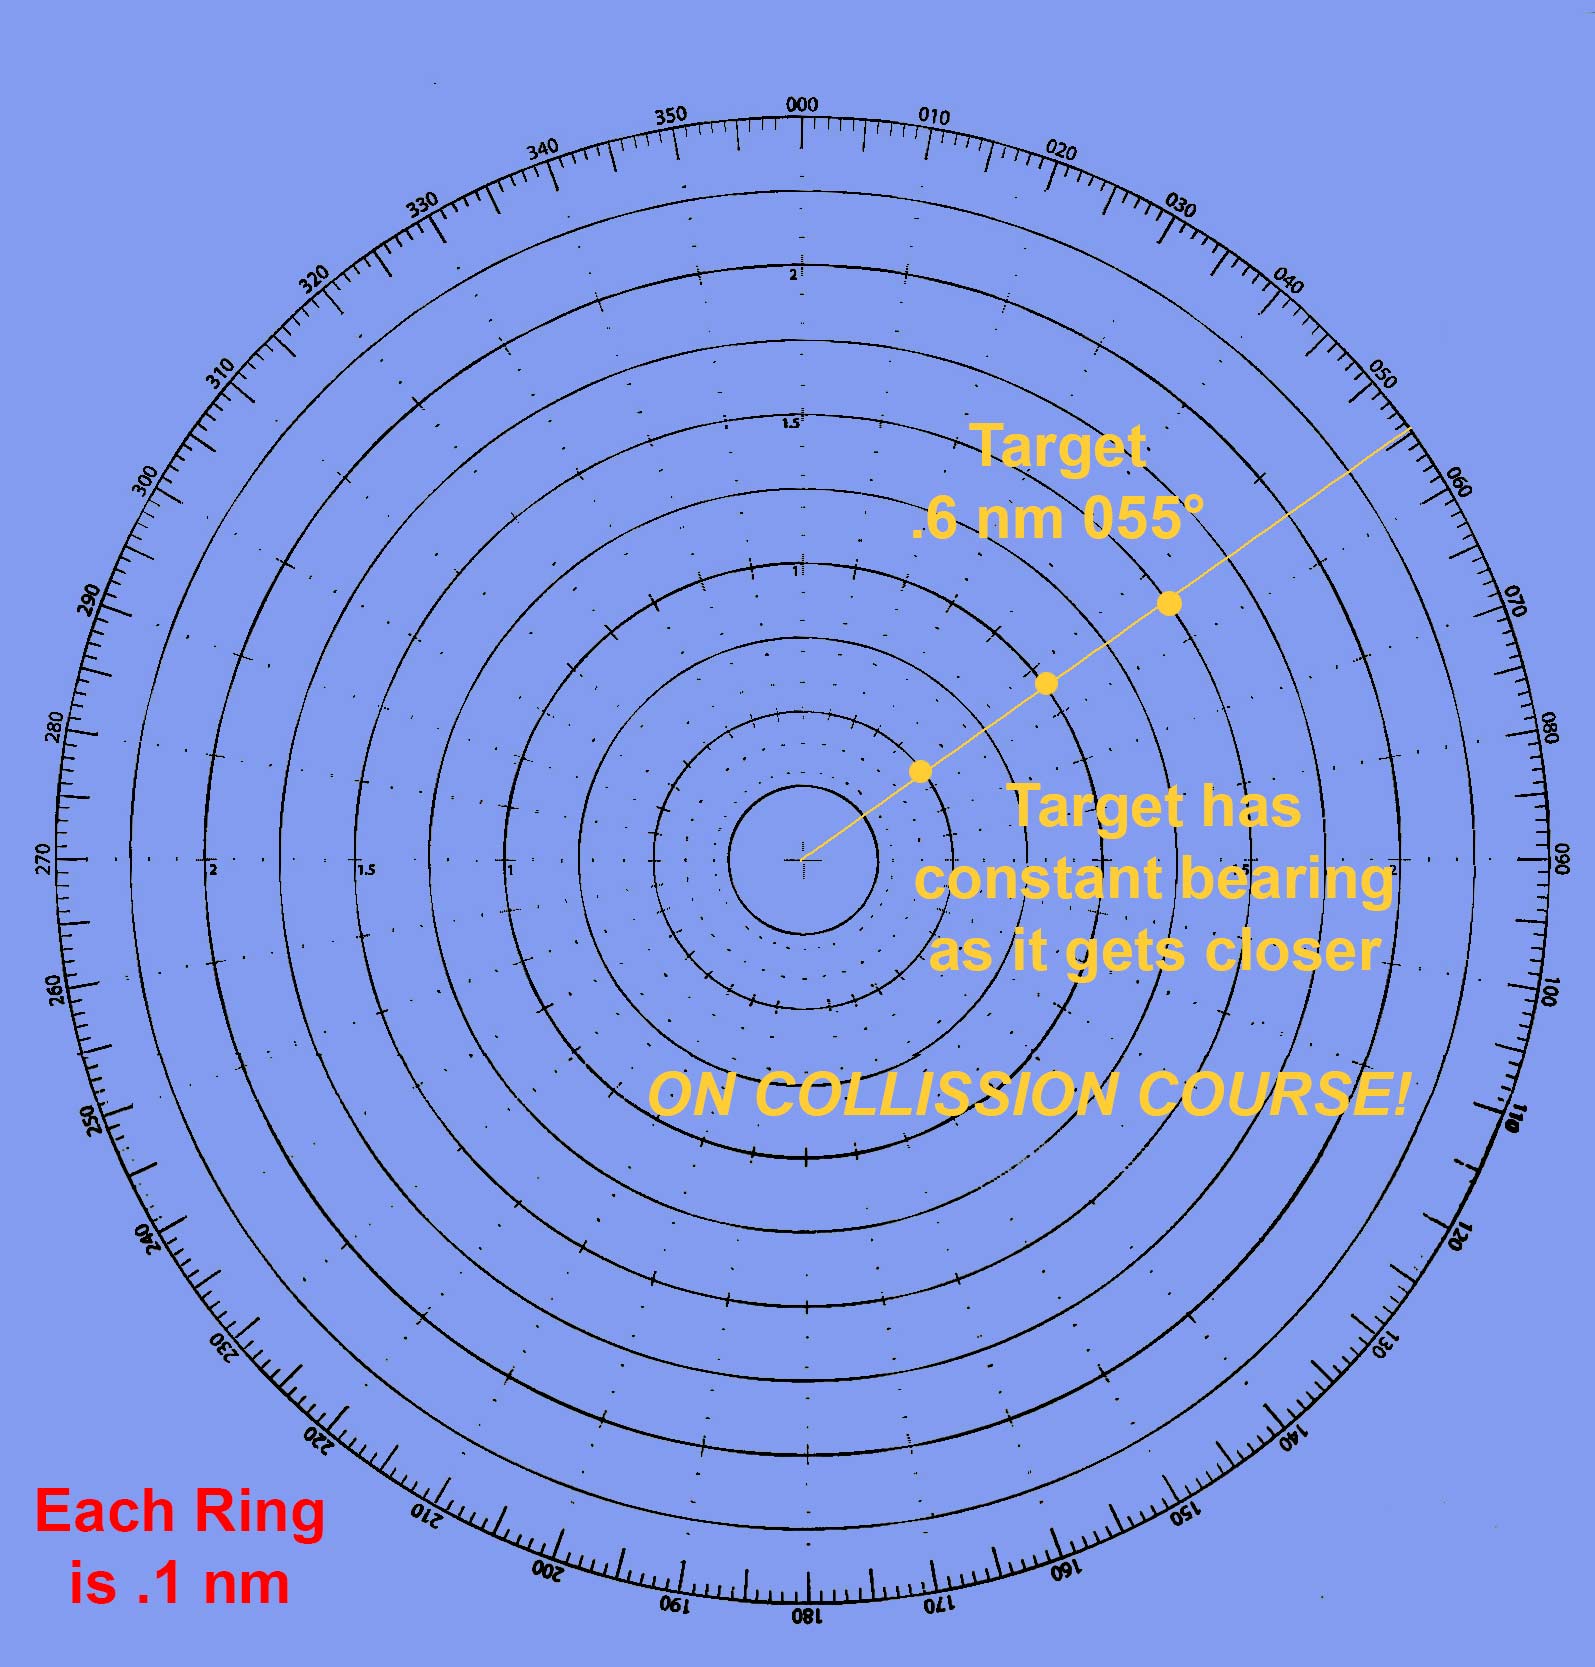
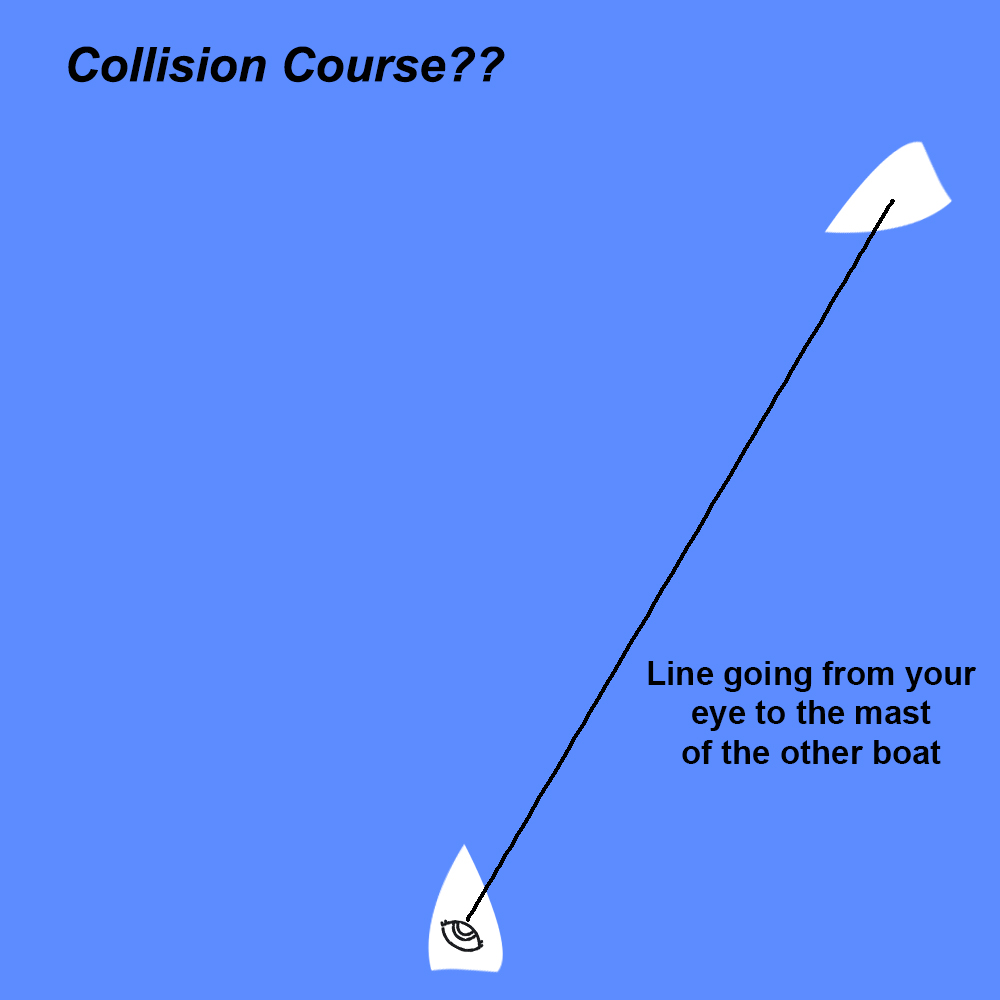
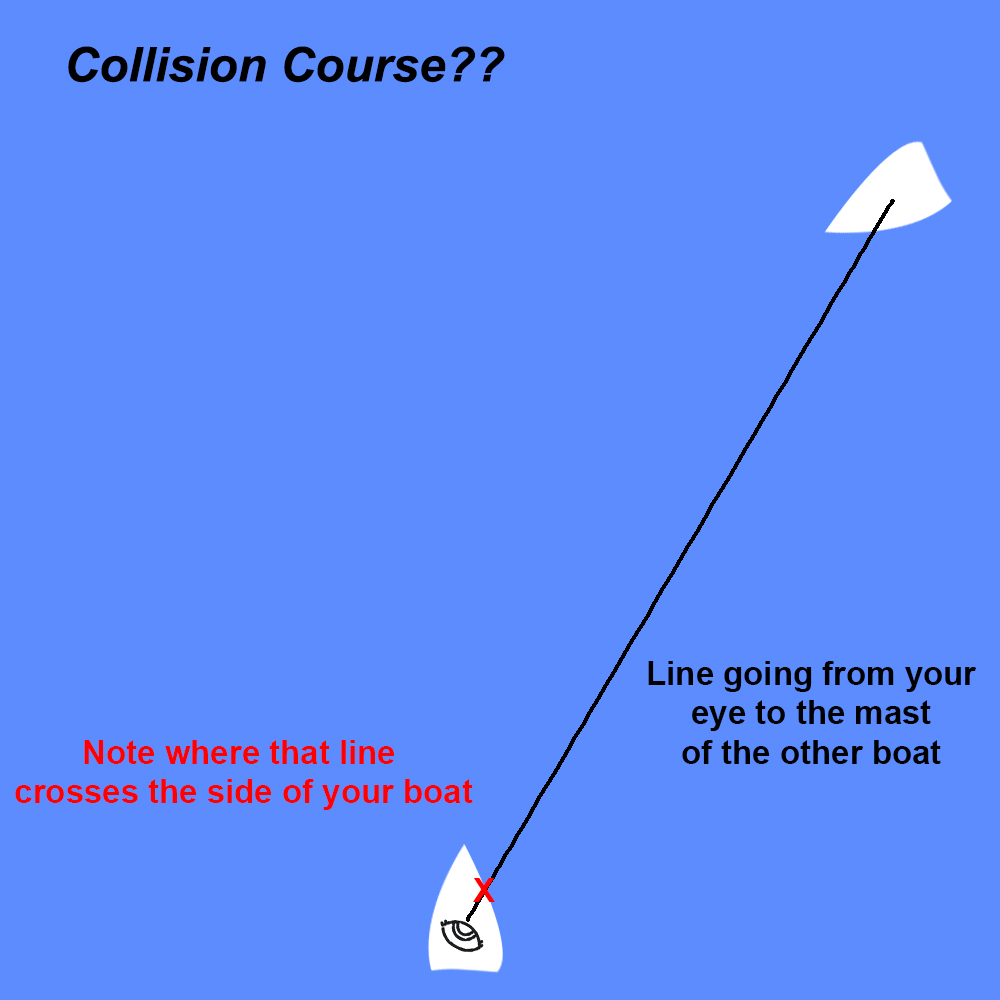
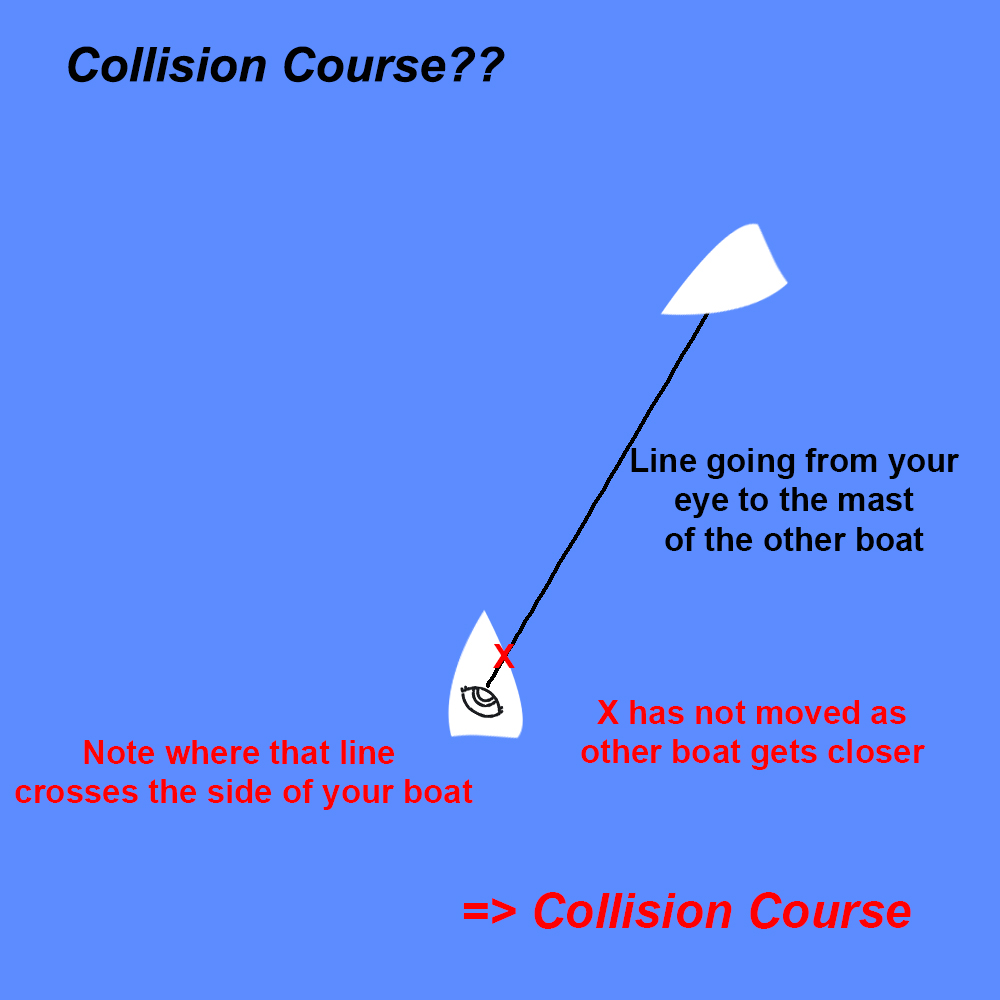
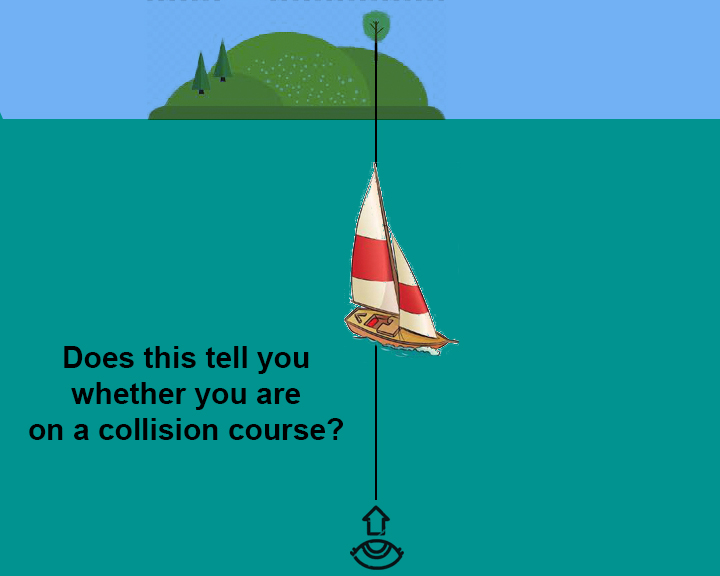
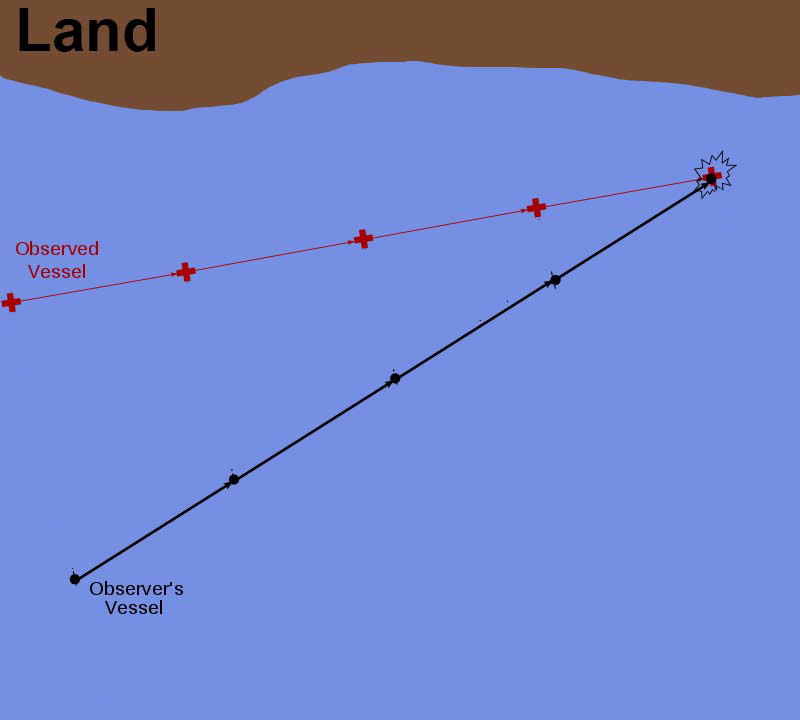
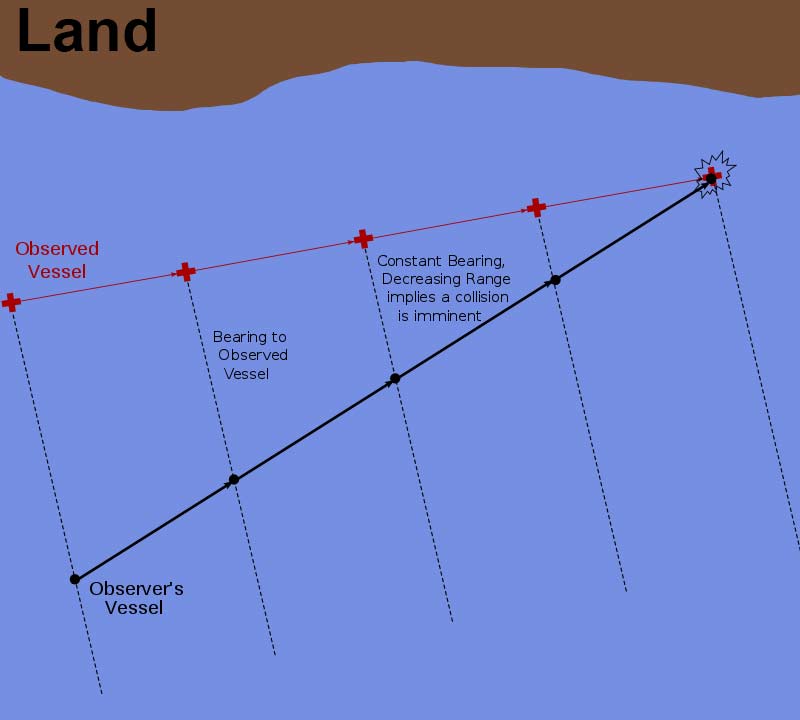
You and another boat are on a steady course. If the bearing to the other boat does not change as it gets closer, you are on a collision cours. Otherwise not. This is how radar works.
Not only that, the Navigataion Rules require that you use this method. I’ll reference Rule 7 – Risk of Collision (Inland)