Today's Open/Close Times based on tide predictions

DateClub TimelineSunsetLow Tide
Wed Dec 6 Noon to 4:21 PM4:51 PM2.2 @ 1:33 PM

red means the Club will be closed. Note that current low tides are around 0.1 feet lower than predictions.

Day Leader's WhiteBoard

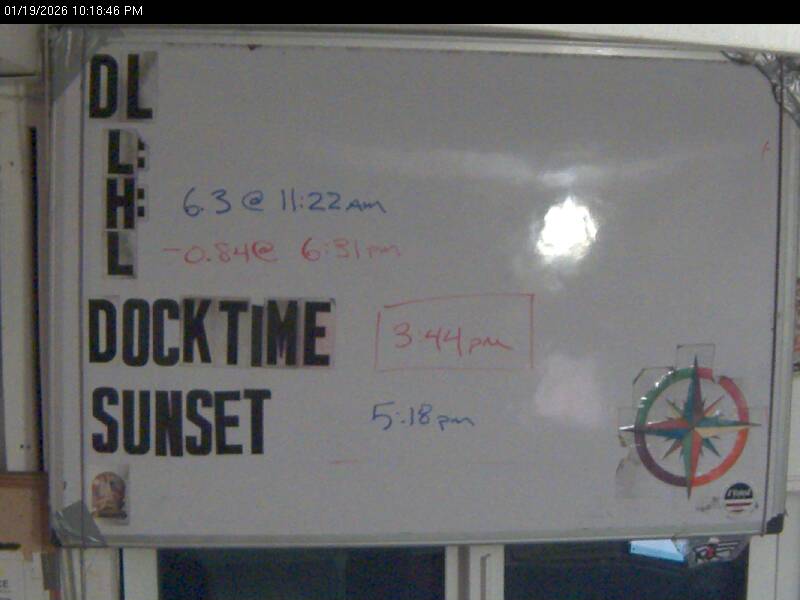
Whiteboard

Unless whiteboard shows today's date, there is no Day Leader or they haven't signed in yet.

My First Windsurfing Lesson

My First Windsurfing Lesson

Blog image courtesy of Jennifer Kroon

We get lots of emails asking about windsurfing lessons at the club.  There are full details if you dig around the website, but this is a slightly less formal overview.

When?

Lessons are nominally 10.30am Saturdays and 11am Sundays.  During winter, we don't run Sunday lessons.  Sometimes you can get enthusiastic members or day leaders to give you a lesson at other times, but don't count on it!  The weekend mornings really are the best time to learn, due to the wind.

The lessons are about an hour on land, and then open-ended on the water, subject to tide and wind.

Yes, it's possible to turn up and pass the written test and self-rescue with a cursory introduction, but we discourage this, since much of the lesson is about club rules and safety (yours and ours).  If at all possible, please come to the weekend lessons.

Continue reading
  8300 Hits
Tags:

Separating the Gybe from the Turn

Separating the Gybe from the Turn

Something I’ve found to help students when they’re learning to gybe is to separate the gybe from the act of turning the boat. A gybe can require no turning at all, and understanding this will improve your gybes and reduce your likelihood of capsizing.

Most of the time, the reason we are gybing is because we want to turn and go the other way while sailing downwind. Maybe we've reached Ashby Ave and we have to head back before we start to feel the disapproving glare of the day leader through their binoculars. Or we're doing tight circles around a buoy and have to keep turning through the gybe. But really, gybing has nothing to do with turning, other than if we're turning downwind, we have to eventually gybe or we just can't continue the turn.

The gybe itself is nothing more than changing tacks (from port to starboard or vice versa) while sailing downwind. Or to put it more simply: a gybe is flipping the sail from one side of the boat to the other. If you’re on a dead downwind run, there is no turning needed. In fact, there are reasons to gybe that don't involve a turn at all. A common case is during racing--if you're on a dead run and want to obtain right of way by switching from port to starboard tack. No turning needed. Or maybe you're headed back home and the wind shifts a bit and you realize you're now sailing by the lee, so you flip the sail to get yourself out of accidental gybe territory. No turning needed.

I've noticed a lot of students (understandably) connect the turn and the gybe and want to turn through the gybe, from broad reach to broad reach, which can often result in a capsize. To help disconnect the two actions I've started doing this exercise:

  • Get on a dead run. Get the jib to cross to the center of the boat and try to keep it there. Watch out for the accidental gybe, and tell your crew to do the same. If you have crew you may want to have someone hold the boom in place to avoid a gybe before you're ready.  They'll also be able to feel the main starting to get back-winded, so they can let you know you've turned too far off the wind.  Maintaining a dead-run can in-itself be tricky, and if you can hold this reasonably well in waves, you're off to a good start!
  • Look at what you're heading towards on the horizon. Try to find a fixed reference point.
  • Now gybe. Try to keep the boat headed dead downwind. Use your reference point on the horizon if it helps. Once the wind catches the sail on the other side, it will try to turn the boat up, so maintaining your heading will require some counter steer with the tiller.  Think of it as a light version of the S-turn.
  • Once you're confident you're still on a run, gybe again.
  • Now do it faster, back and forth, while maintaining course.
  • Try to get down to a few seconds between gybes.
  • By now you're probably at the rocks, so better tack your way back up to the restaurant and do some more.

I've found this tends to create a light bulb moment and hopefully makes gybing in general a little smoother.

Continue reading
  7613 Hits

Slow Sailing

b2ap3_thumbnail_Slow-Sail-to-Buoy.jpg

Slow sailing is a Junior skill and an important one. The objective of slow sailing is to get to a fixed point in space (a dock, a man-overboard,
a buoy) with zero speed. The idea is to come in on a close reach course, where you have an accelerator and a brake.
With the mainsheet all the way out, the sail is depowered, and the brake is the wind and sea against the boat. Pulling in the mainsheet on the falls is the accelerator. You line yourself up on a close reach
course and sail to the target.

There are two skills involved:

1) lining yourself up on a close reach course to the target, and

2) slow sailing on that course to it.

Let's talk about hitting a buoy at zero speed, as it's the hardest of the maneuvers. When you dock, you usually have some room for error, as you don't have to get to a precise point on the dock. But wait, what about a busy Saturday where you have to thread the needle between the only two boats where there's any space between them to dock? If you can lightly touch a buoy on a slow-sail, you can do precision docking.

Continue reading
  8510 Hits

Sailing Small Circles

Sailing Small Circles
b2ap3_thumbnail_Small-Circles-Ideal-Circle.jpg

Small Circles

This is one of the most difficult Junior skills, and it's quite important. But why is it important? In real life, how many  small circles are you going to do? Probably none, after you pass the Junior Test. But you probably will need to do fast turns upwind or downwind, and do fast tacks and gybes, possibly to avoid disaster (like hitting something). And maybe with newbie crew. Think about approaching the dock on a big south wind and getting turned in the wrong direction (like into the sea wall). That's what this maneuver is about. You may never do another full circle in your life, but you may need one or more of the maneuver's components.

The maneuver is also a stress test of your sailing skills. You have to do a bunch of things quickly and competently without time to think - they have to be instinctive. It's also a stress test of your crew communications skills for the same reason.

A real circle?

First of all, it's not really a circle. We think of it as looking like this, here counter-clockwise around a buoy:

Continue reading
  10357 Hits

Demystifying Apparent Wind - Part 3

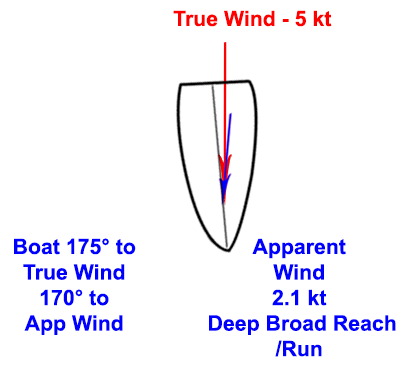
b2ap3_thumbnail_Apparent-Wind-Downwind.gif

The last in the series - Apparent Wind downwind.

It's hard to steer downwind. The waves toss the boat around more, and if you get tossed too much, you'll gybe when you don't want to. You can capsize on a broad reach in heavy winds and seas.

The biggest thing you have to deal with is apparent wind. On a downwind course, small changes in course, wind speed, and wind direction produce large changes in apparent wind.

We'll use the same 5 kt. true wind we've used before and the same Bahia-like boat. You're almost dead downwind - just 5 degrees short of it. Here's what it looks like:

Continue reading
  5714 Hits

Demystifying Apparent Wind - Part 1

Demystifying Apparent Wind - Part 1
b2ap3_thumbnail_Apparent-Wind---Close-Hauled.jpg

A very common problem my students have voiced is that they have trouble figuring out where the wind's coming from. On the one hand, it shouldn't be so hard - turn your head and feel the wind on your ears. When it's the same on both ears, you're either looking straight into the wind or straight away from it. Or (less accurate) look at the yarn on the side stay.

Yet it's not so simple. You think of the wind as coming from the same direction, but when you sail, it doesn't seem to do that. It seems to shift a lot. And "you told me we couldn't sail higher than about 45 degrees into the wind, but that yarn on the stay has a much smaller angle than that". And (yet more observent) "We're sideways to the waves, so we should be on a beam reach, but the yarn says we're still somewhat upwind".

Welcome to the world of apparent wind. This is a simple concept to explain and  understand at a high level, but very hard to get at a detailed level. Everyone gets the simple explanation - you're peddling a bike at 10 knots on a calm day, what do you feel? A 10 knot headwind. The speed you're generating adds to the wind speed to create the wind you feel, the apparent wind. The apparent wind is what you and the bike feel. Peddaling 10 knots in a 10 knot headwind, and you're pumping against a 20 knot apparent wind. Doing the same in a 10 knot tail wind, and Bob's very much your uncle.

Those with a math background easily grasp that this is a vector algebra problem - the boat wind speed adds up with the true wind speed as vectors, where both the speeds and the directions interact. But even if you get that, it's truly hard to see how it all plays out on the water. And I'm speaking as someone with a graduate education in mathematics. In editing this blog, I realized that I had messed up a calculation in my first draft. If you sit down to do the calculations, you have to determine what your boat speed will be at a given true wind speed and point of sail (angle of the boat to the wind). Polar performance diagrams will show this, but good luck finding these for any of our dinghy's.

So my point is that it's quite difficult to build a mental model of this. Instead, you can get a feel of how it happens on the water without trying to understand why, exactly. I did the math from a guess of a polar diagram for a boat similar to a Laser Bahia at 5 knots wind. If you're not racing, it doesn't matter how accurate this is. But it should be pretty typical.

Continue reading
  19456 Hits

Donation Guidelines for Windsurfing Equipment!

b2ap3_thumbnail_storymaker-slideshow-old-school-windsurfing1-515x418.jpg

Introduction

At least once a week, people offer to donate their "old", "beautiful", or "moved to kitesurfing" windsurfing gear.  We reject almost all of it. This post explains why, and gives an idea of what we do accept, for those wanting to donate.

It's All About The Age


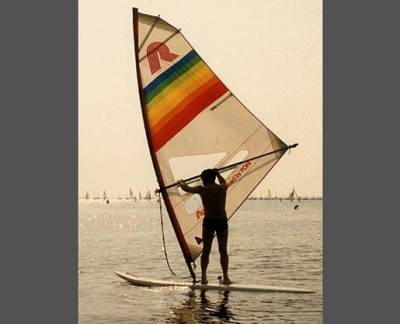
As a general rule, we don't accept boards older than about 5 years.  This beautiful, 30 year old, original Windsurfer definitely doesn't qualify.  I don't care how much fun you had on it in the 1980s. 

How about that 1990s board with all those footstraps on it?  Sorry, no.  And that beautiful fiberglass board? Still no. 

Continue reading
  11005 Hits
Tags:

Downwind sailing and the evils of rounding up

Downwind sailing and the evils of rounding up

One of the common pitfalls of sailing a dinghy downwind is that in a sudden gust, the boat will start to head up, leading to a capsize. In this blog post, I'd like to share some of my thoughts on the factors in play and how to best deal with them. This discussion applies to sailing with just main and jib, as well as to those thrill-seekers using a gennaker.
 
To begin with, why does your dinghy insist on heading up in a gust? There are (at least) two factors involved. To begin with, your dinghy typically has a bit of weather helm: to get technical, the center of effort (COE) on your sails lies slightly behind the center of lateral resistance (CLR) created by your dinghy's foils. In normal conditions, a bit of weather helm makes for a nice responsive tiller that helps you to better "feel" the boat and the wind. However, as the force on the sails increases as happens during a gust, the discrepancy between the COE and CLR is amplified, causing more and more weather helm. This effect will cause your boat to want to head up more strongly during a gust.
 
However, the natural weather helm caused by the discrepancy between COE and CLR isn't typically what will cause you problems. Instead, it is the additional weather helm caused by excessive heeling. Indeed, as the boat heels more, the hull's interaction with the water creates extra weather helm. Furthermore, your rudder is now only partially submerged, giving you less control over rounding up. And that is just the beginning: assuming that you are sailing below a beam reach, the more the boat rounds up, the more the heeling force on the sails increase. This causes more rounding up, which causes more heeling which causes... you can see that this will probably end with you getting wet.
 
Now that we know two of the main factors in play, let's consider three different scenarios.
  • First scenario: you're sailing on a dead run when a gust hits. The force of the wind on the main will indeed cause the boat to want to round up a bit. However, since you're on a run, it won't cause much heeling, so you only have the first aforementioned factor to deal with.
  • Second scenario: you're on a broad reach when a gust hits. Now you're in trouble -- you have both excessive weather helm coming from the force on the main, as well as weather helm caused by heeling. As you round up towards a beam reach, you can't depower the main, and you may end up capsizing.
  • Third scenario: you're on a beam reach when the gust hits. Again, both factors will apply, but as the boat rounds up above a beam, the main will start to depower, reducing heeling and weather helm and saving your bacon.
From the above analysis, we see that the danger of rounding up and capsizing is greatest when sailing close to a broad reach. But never fear: we have some powerful weapons at hand in combating the evil demon of weather helm.
 
First, we would like to be able to depower the main sail while sailing on a broad reach; this will decrease both natural weather helm and excessive heeling. Our first weapon for doing this is the vang or gnav. Easing this control in a gust lets the top portion of the sail twist away from the wind. While crewing for one of our club's most experienced dinghy sailors during the infamous Fast Track squall of May '12, my skipper had me blowing the gnav in every gust, and this is what let us limp back to the club in (more or less) once piece.
 
Our second weapon in depowering the main is of course the main sheet. If the wind is howling 20 knots and your Bahia is screaming along on a broad reach, chances are that your high boat speed is shifting the apparent wind far enough forwards that your main sheet should not be all the way out. The added bonus is that when the gust comes, you can now ease the sheet to help balance the boat and depower the main. If you instead neglected to sheet your mainsail in at all, you can't depower  by easing the main! 
 
Apart from depowering the main sail, the above analysis tells us that we want to do everything possible to keep the boat flat. Anticipating the gusts and aggressively falling off is key. Likewise, hard, aggressive hiking (or even sending crew out on the wire) are also important. Keep in mind, though, that if you are already hiking out hard before the gust hits, you won't be able to up the ante when you need to. Just as with the main sheet, it is highly advantageous to have a bit of room to make adjustment during gusts. Finally, aggressively sheeting in the jib (or gennaker) in gusts so that it stalls a bit will shift the COE forward in the boat, which will also decrease weather helm. Likewise, raking the centerboard aft slightly will shift CLR aft, also decreasing weather helm.
  12583 Hits

Low Tide Launching/Docking

Low Tide Launching/Docking

We've all experienced this, either as sailors or instructors.

You're going away from the dock, parallel to it, but somehow you're getting pushed sideways into the middle dock. Or you're docking, and you have a huge amount of leeway, pushing you into the seawall.

What I learned in the Advanced Dinghy class from Yves is that it's all about sail trim. Even with the centerboard completely down, you have a huge sideways force if you oversheet. Not only is the sail not as efficient as it could be, but the force is more sideways than forward. With the centerboard up (for low tides), the effect is worse.

This is the season of rip-roaring tides (it can go from more than 6' at noon to negative '1 at 6 pm, and the dock time has been as early as 3:30 some weeks).

Thanks to what I learned from Yves, I've been doing the following in my lessons when we had to dock with less than full centerboard. As soon as we get away from the dock, I raise the centerboard, and we sail, completely focused on sail trim. Jib is easy, mainsail more difficult (but more important). I try to get the students completely focused on sail trim. I tell them "They'll tell
you that you can't tack without a centerboard, but they're wrong" after they've tacked without a centerboard.

Continue reading
  7756 Hits

Main Sail Trim by the Tell Tales

Main Sail Trim by the Tell Tales

There's a great book called Mainsail Trimming by Felix Marks that goes into this in great detail. A lot of it doesn't apply to dinghies (travelers, for example). But one thing does - trimming the mainsail using the mainsail telltales.

The telltalls are on the leech (back edge) of the sail, and when sailing upwind from a beam reach  and forward (when the sail is a wing), the tell tales should be streaming, just like both of the jib telltales. But what if they aren't? For the jib telltales, we have the guidelines "move the sail toward the telltale that isn't streaming" or "move the tiller toward the telltale that isn't streaming", and students seem to get that. But I don't think we talk enough about trimming the mainsail using the telltales (I could be wrong here, just my observation).

So (on a beam reach and above), if the mainsail telltales aren't streaming, they're curling to one side--windward or leeward. That's just like one of the jib telltales not streaming while the other one is. Move the sail that direction (as in, ease out if streaming to leeward and trim in if streaming to windward), or move the tiller that direction. Essentially the same thing as you would do to trim the jib.

I've seen a tendency in students to oversheet the main, so I think it's useful to sensitize them to this, and the mainsail telltales are one way to do this.

You can also use the mainsail telltales in a gybe. I went on the water once with Stefano Maffuli and a friend of his who had been head instructor at St. Francis Yacht Club (grazie, Stefano). He said that the mainsail telltales were the best indicator of when to pull the main across in a gybe. They show exactly when the main is back-winded--a much better signal than the jib coming across.

  14577 Hits

Tips for skippering with crew on the wire

Tips for skippering with crew on the wire

Almost all of Cal Sailing's dinghies are equipped with a trapeze kit, and with good reason: our typical stiff summer breezes make it all but a necessity to send someone out on the wire. Having crew out on the wire  can be tons of fun for both you and your crew, but can also be quite a challenge. Here are some tips which can help.

Let's assume that you as skipper have two goals:

  1. Move the boat upwind as quickly as possible.
  2. Make your crew feel comfortable on the wire.

Now, your crew will probably be most comfortable if the boat is kept relatively flat, sudden changes to heel angle are avoided, and the crew is not required to shift her weight. In other words, she can calmly stand on the rail doing nothing but admiring the view (and calling out gusts and lulls).

On the other hand, in order to make your boat move upwind as quickly as possible, you want to keep the boat flat, and to keep  your close-hauled jib at the proper angle of attack to the wind, so that it neither stalls nor luffs.

You, the skipper, have three controls at your disposal: tiller, main sheet, and your body weight. So how do you keep both your crew and the boat happy? Firstly, steer with the tiller to keep the jib at the proper angle to the wind. Secondly, use a combination of body weight and main sheet trim to keep the boat flat. In practice, it is a good idea to hike out moderately and then trim the main accordingly. Indeed, the more you power up the main (while keeping the boat flat), the faster you go. Furthermore, if the wind comes up or down, you still have two controls at your disposal: in a gust, dump the main and hike out hard, and in a lull, sheet in and shift your weight leeward.

Continue reading
  8274 Hits
Tags:

A Couple of Capsize Recovery Tips

Appropriate capsize recovery techniques vary by wind speed, and there are several methods available for righting the boat  in situations where the wind is high and you are unable to keep the boat from re-capsizing. However if you can recover without setting the anchor or having a crew member swim around to the bow to line the boat up into the wind, the recovery will be quicker and easier.

To recover on the first attempt (without re-capsizing) with the least effort in the broadest range of conditions, here are two very useful tips.

First, uncleat the gnav/vang (in addition to the mainsheet & jib), as this will reduce the effect of the wind on the sail when the boat comes back up.

Second, while up on the gunwhale, before stepping onto the centerboard, consider what effect the wind direction will have on the boat once it comes up, and plan the effect the arrangement of your and your crew's weight will have on the boat's balance at that point.

  • If the mast is pointing away from the wind/hull is towards the wind, the crew will be on the downwind side when the boat comes up. Tell the crew to just hang on to the bungees under the gunwhale when the boat comes up, and then come around to the stern to get back in afterwards; when the boat comes up, the person on the centerboard tries their hardest to at least get half way over the gunwhale so as to keep the upwind side weighted down.
  • If the mast is pointed towards the wind (a situation in which a double capsize is very common), the crew will be on the upwind side when the boat comes up. Have them hang onto the hiking straps as the boat comes up so their bodies are draped over the gunwhale. If they  weigh enough--taking the wind's power into account changes the meaning of 'enough'--the person on the centerboard can dry recover, particularly if he/she scrambles quickly across to the upwind side. If the crew is lighter than the person on the centerboard, the person on the centerboard should plan to go down into the water and get back into the boat from the stern (holding on to the boat at all times). 

Under almost all capsize conditions where you're not right by a lee shore or dock, the person on the gunwhale can take as long as they want to consider the situation and to discuss it with the rest of the crew. 

  8067 Hits

Single-Handing in High Wind

Single-Handing in High Wind

Most senior dinghy tests involve assessing the skipper's ability to single hand a dinghy in high winds. And indeed, this is an essential skill. Imagine that you're out in the South Sailing Basin on a beautiful summer afternoon. It's blowing 15 knots, and you and your crew are hiked out all the way when suddenly the hiking strap breaks, and your crew ends up in the drink. (See e.g.  http://youtu.be/ZZTwH8C5bjo for an excellent demonstration by our current Commodore). If you can't pull off a single-handed crew overboard maneuver, your crew will end up on the rocks by Emeryville while you wait for the rescue skiff to arrive.

Here are a couple of pointers which will help you single-hand like a pro.

Depowering the sails. Unless you have the stature of an NFL linebacker, chances are that you will have difficulty keeping the boat flat unless you take some steps to depower the sails. Reefing the main and furling the jib are good starting points. Tightening up the luff of the sail with the Cunningham and/or reefing line will help to flatten the sail, reducing its heeling force. Loosening up the vang or gnav will allow the head of the mainsail to twist and luff, all the while keeping the bottom of the sail powered up.

Balancing the boat. Balance is always key in sailing. Since you no longer have crew in the boat, you'll have to use your own weight much more effectively. Moving forward is essential; otherwise, the bow of the boat gets battered around by waves. Aggressively hiking out will help keep the boat flat. If you're lucky enough to be wearing a harness and your tiller extension is long enough, you can even go out on the trapeze! 

Tacking and jibing. Tacking a dinghy while single-handed in high wind can be quite challenging; large swells crashing against the bow of the boat tend to slow the boat before it passes through irons, causing the tack to fail. Furling the jib and loosening the vang as suggested above compound the problem, as the boat no longer points as high. In some situations, jibing the boat is the only viable option for switching tacks. For this, loosen up the vang (if this wasn't already done), and start the jibe with a maximal amount of boat speed. You'll have to aggressively use your weight and the tiller to keep the dinghy from rounding up and broaching.

Continue reading
  10146 Hits

Use The Force

Use The Force

When we sail we use all our senses, but the one we rely most heavily on is our sight.  This was brought home to me when I took my first Wednesday night keelboat lesson several years ago.  I had grown accustomed to using the telltales on the shrouds to get a general sense of the wind when sailing the dinghies.  I even carried some bits of yarn in case the boat I was on didn’t have any.  I took the helm on the keelboat on a dark night and--oh crap--I couldn’t  see the tell tales.  I struggled that night, but realized that what had started as an aid had become a crutch.

The last Monday night advanced dinghy class, we worked on sailing without any sight at all.   But you don’t need a class to try it.  First make sure you have decent crew who is not blindfolded, and that you’re in an area with a lot of space (few boats and no obstructions).  Pick a day with moderate wind.   Put a blindfold on and try to hold a course.  Your crew can give you feedback.  Try to feel the puffs of wind before they hit the boat.  Pay attention to the balance of the boat.  Listen to the sound of the boat moving through the water.  Play with the main sheet.  Can you tell when the boat accelerates and decelerates?  Smell your gear, yeah, you should probably wash it.   Try sailing different points of sail.  If you’re feeling confident try a tack.

It’s as easy as bagging womp rats back home in Beggar’s Canyon.

  6340 Hits

How to buy your first VHF handheld for your CSC Senior kit

Candidate Senior sailors need to own their own VHF radio. This guide is designed to give some basic orientation on what to look for when shopping for your first handheld VHF radio. This guide is not a generic guide but designed explicitly for use at the Cal Sailing Club, for brief recreational use on dinghies and keelboat cruises inside the bay area. You need a radio for basically two things: contacting the day leader and, in an extreme situation, contacting the Coast Guard. Senior skippers need to have a radio with them in order to sail outside of the Junior area, and will often use them when cruising with other Seniors. 

Understand waterproof rating Most models are water proof and submersible, meaning they can be dropped into water and still be functioning when recovered. JIS4 means that the radio is barely splash resistant, JIS8 means the radio is submersible, it can stand for up to 30 minutes below 5' of water. Be careful when reading the descriptions when shopping because it's not uncommon to find JIS4 rated radios claimed as being 'waterproof'.

Floating or not? You  want the radio primarily for your own safety, and you want to make sure it is securely attached to you at all times. It isn't going to help you  if you leave it on a keelboat but fall off, or you lose it while  sailing but don't realize it (a pretty likely occurrence if it isn't  secured).  For both dinghies and keelboats, assume  that you'll end up in the water, so the radio has to be securely attached to  you. CSC keelboats have a radio on board, so the portable one is for extra safety. The models that also float can be easier to recover in case they get detached from you but they can be slightly bulkier and more expensive. The extra cost  of a floating one can be easily recovered the first time the radio drops in the water (which is not so unlikely, according to stories heard at the club). 

Whether you decide to get a floating or non-floating model, make sure that the radio is securely tethered to your gear so that in a capsize it won't be ripped off of you. In general, do not rely  just on the clip that attaches the radio to your life vest. In case you go for non-floating, you may want to get a waterproof case for it with enough buoyancy. You have to be careful, though, and take the radio out of the case when you're not using it otherwise the water (vapor) in the case can corrode the radio. The case needs to be securely attached to your life vest.

Power, screen, control and other features to look for 5 watt should be the minimum transmitting power. Rechargeable NiCad or Li-ion batteries are usually provided by the manufacturer, it's nice to have the possibility to put in regular AA batteries, too. Dual scan means that the radio will scan Channel 16 along with another Channel (69 for CSC). This is important because technically any boat under way is required to monitor Channel 16. Any boat carrying a VHF, whether  required to or not, is required to monitor Channel 16. So when you're  out the bay listening to our Channel 69, you have to also monitor Channel  16. The Dual Scan feature does this. Many VHFs have a triple scan feature, which monitors both Channel 16 and Channel 9 (the standard hailing channel). Squelch  is widely used in two-way radios to suppress the annoying sound of channel noise when the radio is not receiving a transmission. Most handheld radios have a separate squelch control to set the threshold to the actual noise that's on the channel, which can vary. Control knobs to adjust volume are generally more usable than push buttons: think you may be wearing gloves or have your fingers slightly incapacitated when you really need to use the radio. If you carry the radio in a case, push buttons to control the radio volume can be better. Make sure that the screen is very visible also in daylight. Backlit displays are useful in low light. Some radios have water-activated lights that should make the radio much easier to locate in the event it goes in the water in low light conditions.  A lock mode prevents the buttons to be operated when not needed.

Continue reading
  7679 Hits
Tags:

Rudderless But Not Adrift: Sailing Without Your Rudder

We covered rudderless sailing at our Monday afternoon advanced dinghy lessons last week. Knowing how to rudderlessly sail is crucial not only in the (sort of rare at CSC) event that your rudder falls off (!), but also deepens your understanding of sail trim, boat handling, and makes you look pretty epic out there on the Bay. And let's face it: if you look good, you're probably sailing gooder.

It's also a skill you need to know to pass your senior dinghy & keelboat practical tests at CSC.

One simple resource that can be useful to get your started is this rudderless e-book (click the link to download), written by CSC member Joel Brand. 

Some pointers from our rudderless practice session and discussion last week:

If in a dinghy, try and get your rudder completely out of the water. It can still affect your course if it's in the water. As with all these tips provided below, however, try all sorts of different ways to maneuver and see what happens. Try it with the ruddder up, then down and swinging freely. Wind strength, waves, sail plan, and weight in the boat will all affect how your actions impact your course corrections...much like on any given day. Experiment!

Continue reading
  14092 Hits

Notes, Pictures, Video from our Recent Racing Study Group


b2ap3_thumbnail_IMG_3314.jpg

As you may have heard, during the month of April we conducted a racing study group with the intention of improving racing skills, rules and tactics for club members.   The group was oversold with 22 members and 4 volunteer instructors.  We were fortunate to recruit some of our best racing resources to lead both classroom and on-the-water practice sessions, including Cory Schillaci, Paul Kamen, Seamus Vanecko, and Mark Playsted.  In this post I want to share a couple of pictures, Cory's rules quiz handout for you to test your own knowledge of the rules, and the entire tactics classroom session video by Paul Kamen.  I did not take pictures from the on-the-water sessions because we were all on the water, but suffice to say it was exciting with up to 11 boats on the water plus this skiff - and with at least one NASCAR style pile up.  Fortunately there was no damage or injuries.


Standing room only - we more than filled the Marina conference room


Continue reading
  5695 Hits

The Art of Stepping Off

b2ap3_thumbnail_Step-off.gif

Stepping on and off a dinghy with style can be an art. One of the best pieces of advice I received early on in my CSC career (after making it onto the dock still dry by sheer luck) was to commit to stepping off and never looking back! We all fear the dreaded plunge into the murky waters of our beloved dock...to inevitably be witnessed by the many bench sailors and commentators who collect like barnacles around the club house. The key, as beautifully demonstrated here by our soon-to-be Junior sailor Phillipe (and gif-elated by our very talented Jennifer Kroon), is to stay low/keep some bend in the knees, keep hold of the boat to steady yourself as you move forward, and let go as soon as you're ready to step off.  Anything else leads to wobbly do-the-splits-ville...and doom. Okay, not really. You're not a full-fledged sailor in my opinion until you've fallen into the water at the dock at least once to wash yourself clean of any dignity you may have been clinging to.

Click the image below for the brief video.

Any other tips for looking like a boss at the dock?

  7389 Hits
Tags: