Today's Open/Close Times based on tide predictions

DateClub TimelineSunsetLow Tide
Mon Jun 30 Late Open12:52 PM to 8:06 PM8:36 PM0.0 @ 10:21 AM

red means the Club will be closed. Note that current low tides are around 0.2 feet higher than predictions.

Day Leader's WhiteBoard

Whiteboard

Unless whiteboard shows today's date, there is no Day Leader or they haven't signed in yet.

All things related to sailing: tips, howto, pictures of sailing boats, sailors, pirates and all

Keelboat Docking - Part 1 - Planning and Preparation

Introduction to the Blog Series

Docking our keelboats under sail is one of the most difficult skills required for the Senior Rating. You have to be able to do it in all wind directions and in several boat types that handle very differently. It takes a huge time investment and a lot of commitment and practice to make the grade.

Everything you've learned on dinghies applies to keelboats, and on dinghies you establish a solid basis of sailing skills. This is why we require a Junior rating to take keelboat lessons, and why it's important to get your Senior Dinghy test passed before getting serious on keelboats.

But the transition from a dinghy to a Pearson Commander is not easy, as the latter has a large mass and a full keel, so it handles very differently from a dinghy. It does everything slowly, including stopping, but also powering up. If you get below the critical speed for steering it, it can take 8 or 9 seconds for the keel to power up, and in that period you're being pushed sideways. You could end up pressed against a downwind piling or boat.

Our keelboat slips are faced approximately west, so normally into the wind, just like our dinghy dock in the South Sailing Basin. So in a "normal" west or south-west wind, you dock pretty much the same way. Slow sail on a close reach into the dock/slip. But the boats are very different, so the procedure becomes more challenging on a keelboat, not to mention the damage you can do if you screw up.

This is the first in a series of blogs on keelboat docking to help you understand the differences between dinghy and keelboat and the additional factors that become important with the latter. I will assume a "normal" west or south-west wind, as this is what you'll be dealing with 80% of the time, at least. And initially, I'll be assuming relatively constant wind, although later in the series I'll talk about wind shifts and how to deal with them. I'm also assuming that you're planning to go into one of CSC's docks with a reasonable amount of time to prepare and plan. As you get more advanced, you will be required to do very quick impromptu dockings, but that comes much later.

Continue reading
  4474 Hits

Docking Like a Pro

angle of approach

There are a couple ways to come into the dock. The method new skippers gravitate towards at first, because it's easier, is to come in with plenty of speed and do a final turn up into the wind at the end to avoid banging into the dock. Or they don't even do the turn and just bang into the dock... I guess this would be a 3rd way, but highly undesirable.

The preferred method more properly utilizes slow sailing. Docking and COB are the main reasons we teach slow sailing. When you have a firm grasp on slow sailing, you will be able to come to a stop 1" from the dock as your crew casually steps off the bow.

Here are the steps for docking like a pro:
(Credit where credit is due, I've had this best explained to me by Robert O. Come work the keelboat dock during open house sometime and watch Robert dock a keelboat singlehanded to get an idea of the ideal you're shooting for.)

- When you're coming in to the docks watch the wind socks to get an idea of the wind direction at the dock, which may be different than it was when you were out sailing.  

- Pick an exact spot on the dock. This is where you're going to try to end up. You don't have to tell anyone else the exact spot. If you don't hit it exactly, and are a foot off, no one else will be the wiser, it will still just look like a really good docking to them.

Continue reading
  4094 Hits

Small Circles - the Gybe

I did a blog a while ago on Small Circles and how to teach it.

I think doing Small Circles is an important skill and rightly a required Junior maneuver, not so much for the circles, but for other things. However, as Nathan has pointed out in the blog comments, doing circles quickly is important in racing, if you're bad.

In Small Circles, there's a lot going on in a short amount of time, so it's a stress test of your sailing skills, your boat control, your weight balance, and your crew communication. Sailing a circle flawlessly (of whatever radius, but constant) is a challenge. One very good Club racer told me that one of the best racing exercise is doing lots of circles in a row, maybe 100.

But really tight circles is a different beast. It has all of the challenges above, but it requires some rudderless techniques to make the turns really fast and tight. My blog of a couple of years ago missed an important thing.

In the blog, I talked about how you do fast upwind and downwind turns, which to me is the real value of learning this. You might have to do either near the dock, combined with a tack or a gybe. But I glossed over the gybe itself, which is an important part of it.

Continue reading
  4824 Hits

A quick and dirty guide to asymmetrical spinnakers

rigging
halyard
bowsprit

Introduction


Many dinghies, including the RS 500, RS Venture, and Laser Bahia, can be equipped with a gennaker, also known as a kite or asymmetrical spinnaker. This large sail can be used effectively on points of sail between a run and a beam reach, and may greatly increase boat speed. It can add a lot of excitement and get you up and planing when the wind might otherwise be insufficient.

The purpose of this short guide is to touch on the finer points of flying the gennaker on a dingy similar to those mentioned above. I assume that the reader is familiar with the basics of dinghy sailing.

Rigging

To rig the gennaker, you should:

  1. Attach the tack of the gennaker to the bowsprit;
  2. Attach the gennaker halyard to the head of the sail;
  3. Run the dowsing line through the retrieval points on the sail;
  4. Attach the gennaker sheets to the clew of the sail;
  5. Run the sheets through the gennaker blocks and tie them off.


The trick is to do this all without anything getting tangled up. It can be helpful before starting to first make sure the gennaker is untwisted. You can do this by making sure two of its edges are untwisted; this will automatically untwist the third.

Continue reading
  19281 Hits

Your Anchor is your Friend

I admire David Fraser's willingness to share his "less than optimal" sailing experiences in these blogs so that others can learn from his mistakes. They say there are those who don't make mistakes (I don't believe that), those who learn from others' mistakes, those who learn from their own mistakes, and those who never learn. Aiming at the second category, I want to imitate David's example by offering a recent experience of my own.

The other day I got to the Club a little early, and thought I'd play with jib-only sailing on a Quest before lessons started.

I left the (Cal Adventures) dock under jib only, having done nothing with the mainsail. I was planning to go out and dock under jib alone a few times before students showed up. That was the plan, at least.

The wind was pretty much westerly, so I was leaving on a beam reach. I knew that jib trim was really important, and that I shouldn't start out pointing too high. But for whatever reason, I couldn't point high at all. No matter what I tried, I was going slowly downwind, toward the rocks. Maybe I wasn't handling it correctly, maybe the Quest can't point high on jib alone, who knows? Sometimes it's you, sometimes it's the boat, sometimes... who knows what it is? What mattered then was that I couldn't do it.

I decided to heave to and get the main up, admitting failure (better than landing on the rocks). The mainsail doesn't always go up easily on the Quests (especially on this one), and it looked like getting the boltrope into the mast track might take some doing. When you're properly hove to, you have some sideways way on--that is, you're slideslipping--and I was going slowly, slowly toward the rocks. I had no idea how long it might take to get the main up.

Continue reading
  4691 Hits

The two-handed drill for puffs and lulls

A while ago, James Clarkson recommended one of Frank Bethwaite's books on sailing to me. I forget which one, as I now have three of them. They're incredible but incredibly dense, so I'd only recommend them to the "quants" of the sailing community. And even then, you'll read a lot more about  weather systems than you ever wanted to learn, and more detail on everything than you can comprehend. That's how Frank was. He was a pilot (of commercial flying boats, think about that), a meteorologist (the official metereologist of the Austrailian Olympic team in several Olympics in the 1970s), and a sailing fanatic as coach and designer. Three of his kids (sons and daughter) won Olympic medals, and one of them may have invented the gennaker (as always with inventions, there are priority disputes). Frank died in his 90s in 2012.

For the patient reader, there's really wonderful stuff in his books. One is an explanation of why sail twist needs to be very different in light winds than in higher winds (another post?). And there are many others.

One very practical thing I got out of his books was a technique and a teaching technique of how to respond to puffs and lulls. We all know how to do this, we do it, and we teach it to some extent. You have three controls: weight placement (out in a puff, in in a lull), tiller (pinch in a puff if the boat can do it, fall off in a lull), and sheet (easy in a puff, trim in a lull, not just mainsheet, but also jibsheet if you're really concerned about speed). I tell basic students that they have these three controls, and to use one or more  of them when they get a puff (at this point in their development, they're not so worried about lulls).

Frank was obsessed with keeping the boat flat and as fast as it can go (these are correlated). Assuming a decent wind, you're hiked out. We're assunming you have the tiller extension in one hand and the mainsheet in the other. A puff will heel the boat to leeward, and a lull will heel it to windward if you don't move your weight in either case. His technique is this: when the boat heels, don't move your weight, but move both hands to the down side, the sheet hand more than the tiller. Never luff.

So in a puff, you're easing the main as you're pointing slightly upwind. In a lull (or in the recovery after a puff), you're doing the opposite - sheeting in the main and pointing slightly downwind.

Continue reading
  5913 Hits

An important fine point on Docking in Low Tide


One of the things I love about sailing is that I learn something every time I go out, I'm constantly expanding my knowledge and skills.Talking with several of the very best sailors in the Club recently, I heard the same sentiment.

We're in the season of low tides and early closings, and I learned something about low-tide docking.

I did a blog post a while ago on docking in low tide. I recommend looking at this post, as you need to dock in a completely different way than you normally do. You come in way upwind instead of downwind, and you don't (can't) slow sail (you'll just get pushed sideways into the seawall).

In the present post, I want to amplify a small but important detail, which I discovered recently docking in low tide (wind from the east in this case, but that doesn't matter). I was following more or less the course I recommended in the earlier blog: go upwind, downwind past the dock, and then shoot up:

Continue reading
  5322 Hits

Rigging a Bahia's Reefing Line


I've had to correct mis-rigged Bahia reefing lines recently, so I thought I'd explain how to rig the line properly. You'll have to do this if the main sail is crunched at the leech when you raise it fullly or if you can't fully reef the sail.

It's a little confusing, as it's two lines in a "jiffy reef" system, so that you only have to pull on one line to pull down both the luff and the leach of the sail. But once you get the picture, it isn't that hard to deal with. Here's what it looks like:

The line through the leech of the sail attaches to a block in the boom. The line through the luff of the sail runs through the block and back out the forward end of the boom through the cleat.

So what happens when you reef is this. You pull on the line at the forward end of the boom. This pulls the block attached to the leach line forward through the boom, pulling the aft reefing line down and raising the boom to the reefing gromet. You get here:

At this point, the block is as far forward as it can be in the boom, so pulling more on the reefing line pulls the luff reefing line down to the boom (you ease the halyard as you do this). So you get to here:

Continue reading
  11764 Hits

Separating the Gybe from the Turn

Something I’ve found to help students when they’re learning to gybe is to separate the gybe from the act of turning the boat. A gybe can require no turning at all, and understanding this will improve your gybes and reduce your likelihood of capsizing.

Most of the time, the reason we are gybing is because we want to turn and go the other way while sailing downwind. Maybe we've reached Ashby Ave and we have to head back before we start to feel the disapproving glare of the day leader through their binoculars. Or we're doing tight circles around a buoy and have to keep turning through the gybe. But really, gybing has nothing to do with turning, other than if we're turning downwind, we have to eventually gybe or we just can't continue the turn.

The gybe itself is nothing more than changing tacks (from port to starboard or vice versa) while sailing downwind. Or to put it more simply: a gybe is flipping the sail from one side of the boat to the other. If you’re on a dead downwind run, there is no turning needed. In fact, there are reasons to gybe that don't involve a turn at all. A common case is during racing--if you're on a dead run and want to obtain right of way by switching from port to starboard tack. No turning needed. Or maybe you're headed back home and the wind shifts a bit and you realize you're now sailing by the lee, so you flip the sail to get yourself out of accidental gybe territory. No turning needed.

I've noticed a lot of students (understandably) connect the turn and the gybe and want to turn through the gybe, from broad reach to broad reach, which can often result in a capsize. To help disconnect the two actions I've started doing this exercise:

  • Get on a dead run. Get the jib to cross to the center of the boat and try to keep it there. Watch out for the accidental gybe, and tell your crew to do the same. If you have crew you may want to have someone hold the boom in place to avoid a gybe before you're ready.  They'll also be able to feel the main starting to get back-winded, so they can let you know you've turned too far off the wind.  Maintaining a dead-run can in-itself be tricky, and if you can hold this reasonably well in waves, you're off to a good start!
  • Look at what you're heading towards on the horizon. Try to find a fixed reference point.
  • Now gybe. Try to keep the boat headed dead downwind. Use your reference point on the horizon if it helps. Once the wind catches the sail on the other side, it will try to turn the boat up, so maintaining your heading will require some counter steer with the tiller.  Think of it as a light version of the S-turn.
  • Once you're confident you're still on a run, gybe again.
  • Now do it faster, back and forth, while maintaining course.
  • Try to get down to a few seconds between gybes.
  • By now you're probably at the rocks, so better tack your way back up to the restaurant and do some more.

I've found this tends to create a light bulb moment and hopefully makes gybing in general a little smoother.

Continue reading
  9400 Hits

Slow Sailing

b2ap3_thumbnail_Slow-Sail-to-Buoy.jpg

Slow sailing is a Junior skill and an important one. The objective of slow sailing is to get to a fixed point in space (a dock, a man-overboard,
a buoy) with zero speed. The idea is to come in on a close reach course, where you have an accelerator and a brake.
With the mainsheet all the way out, the sail is depowered, and the brake is the wind and sea against the boat. Pulling in the mainsheet on the falls is the accelerator. You line yourself up on a close reach
course and sail to the target.

There are two skills involved:

1) lining yourself up on a close reach course to the target, and

2) slow sailing on that course to it.

Let's talk about hitting a buoy at zero speed, as it's the hardest of the maneuvers. When you dock, you usually have some room for error, as you don't have to get to a precise point on the dock. But wait, what about a busy Saturday where you have to thread the needle between the only two boats where there's any space between them to dock? If you can lightly touch a buoy on a slow-sail, you can do precision docking.

Continue reading
  10274 Hits

Sailing Small Circles

b2ap3_thumbnail_Small-Circles-Ideal-Circle.jpg

Small Circles

This is one of the most difficult Junior skills, and it's quite important. But why is it important? In real life, how many  small circles are you going to do? Probably none, after you pass the Junior Test. But you probably will need to do fast turns upwind or downwind, and do fast tacks and gybes, possibly to avoid disaster (like hitting something). And maybe with newbie crew. Think about approaching the dock on a big south wind and getting turned in the wrong direction (like into the sea wall). That's what this maneuver is about. You may never do another full circle in your life, but you may need one or more of the maneuver's components.

The maneuver is also a stress test of your sailing skills. You have to do a bunch of things quickly and competently without time to think - they have to be instinctive. It's also a stress test of your crew communications skills for the same reason.

A real circle?

First of all, it's not really a circle. We think of it as looking like this, here counter-clockwise around a buoy:

Continue reading
  12888 Hits

How to Make the Most of your Weight in High Winds

b2ap3_thumbnail_Boat-Diagram.png

During the summer months or during the addiction-satisfying winter storm sailing, you can often find yourself overpowered. I’ve also heard of this several times during senior tests where the tester “falls” overboard for the legendary single-handed man overboard, occasionally where the tester is “unconscious”, typically in something like 20 kts. As the wind comes up from a comfortable 10 kts, the full sailed Bahia and JY will begin to require a bit more leverage than hiking out supplies, depending on crew weight. This is the beginning of the wind range that requires, or at least benefits from, using the trapeze. If you’re comfortable with your crew and/or your ability to drive the boat, start to use this. It’s a lot of fun to trapeze while single-handing and is arguably the most fun you can have without flying the kite, but be prepared to swim on your first few outings.

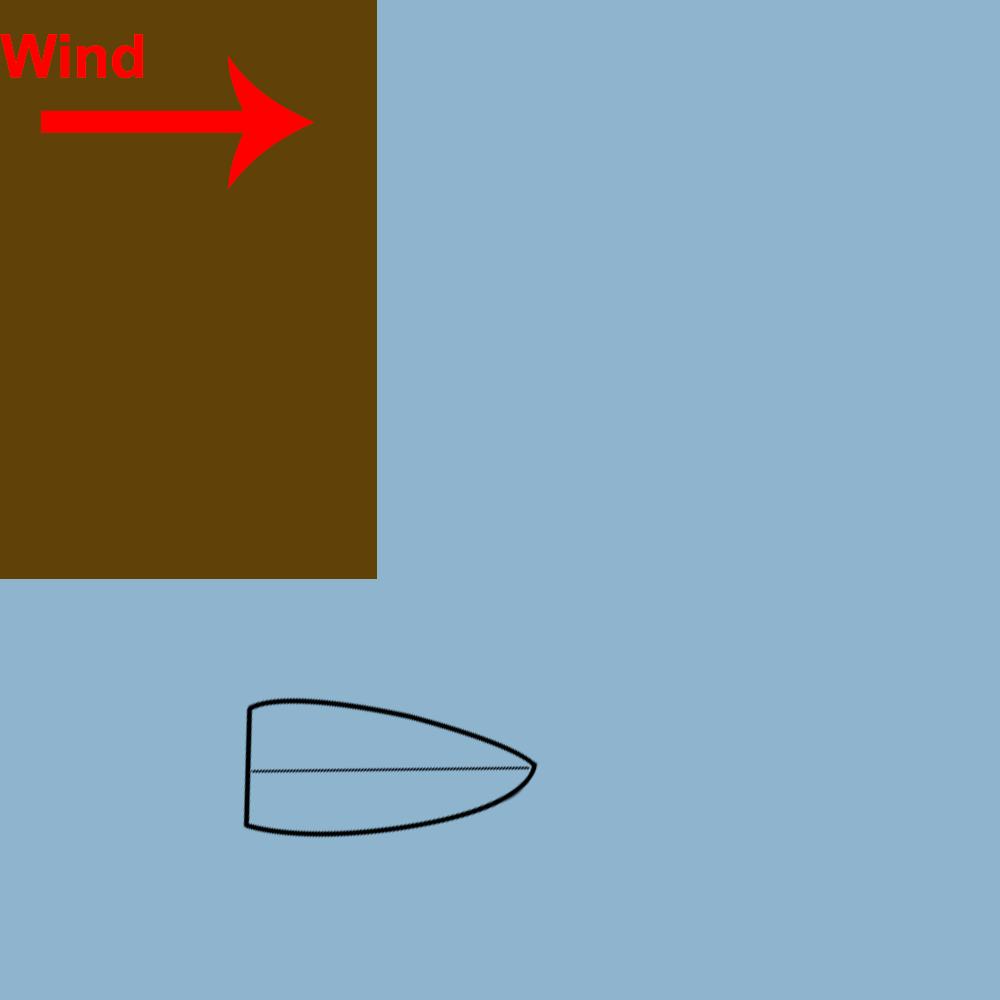
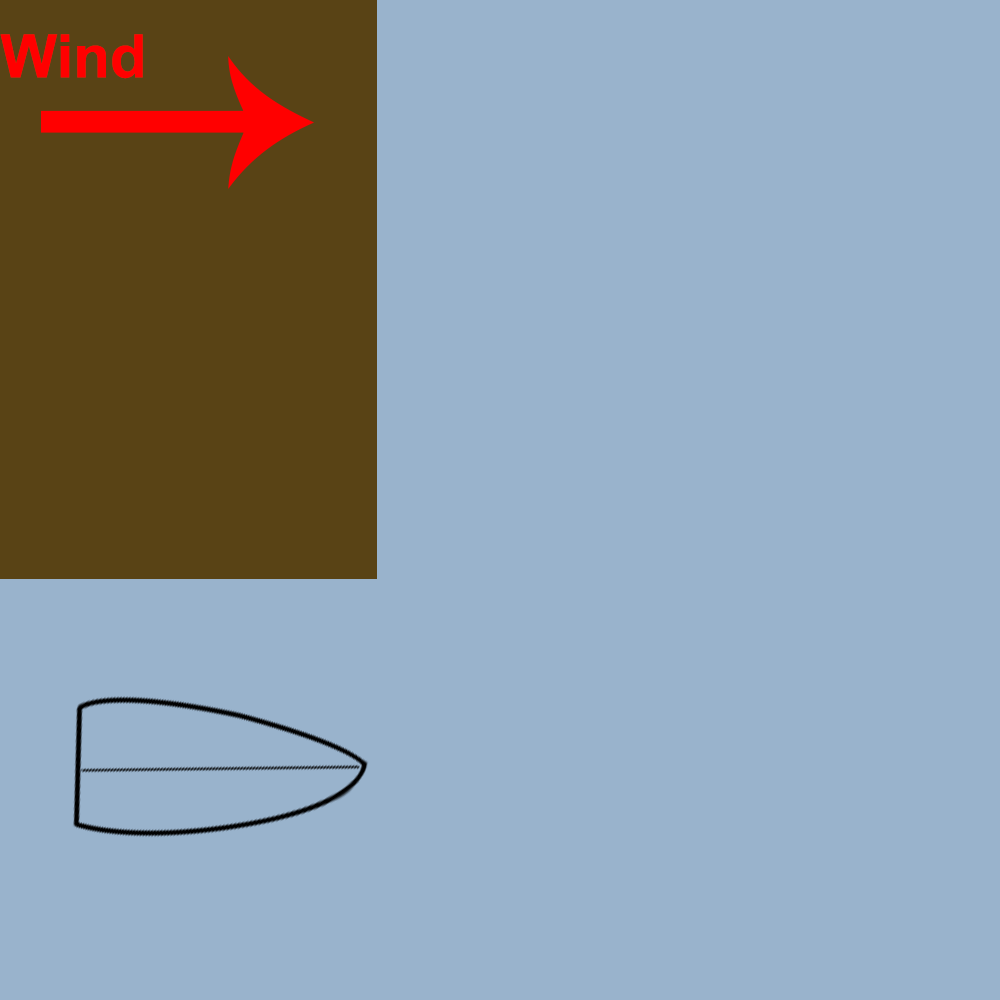
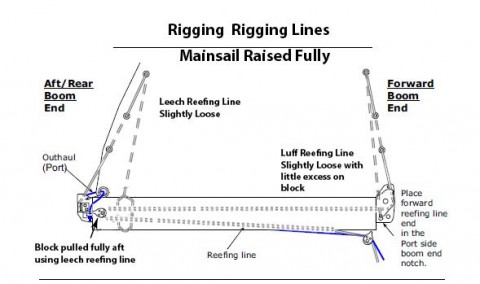
As the wind increases further to the over 15 kt range, the challenge really starts to kick in. Depending on your and your crews weight and skill, you'll need to consider various ways to depower, the most obvious being reefing. If you're luffing your sail more than not, you should be reefed. Another way to depower your main sail, is to pull on your cunningham. As the wind comes up, you should also use your vang/gnav to flatten the sail and change the placement of your draft in balance with your additional cunningham. This is the standard sail trim and depowering technique. As you struggle to keep the boat powered and moving, you can start to ease your jib a bit. This has the tendency to twist off the top of the sail and allow the boat to breathe a little bit by opening the slot between your main and jib. Closing this slot is what causes the “speed bubble” in the main, due to the wind coming off the jib backwinding and the main. As you’re “more” overpowered, you can ease your vang/gnav to twist off the top of your main sail.

One of the things that I haven’t seen done often at CSC is changing the placement of the centerboard while sailing. It’s commonly thought, at least at first that your boat is “under control” if it’s upright, but in reality, your boat is only under control when you are able to make headway and able to maneuver in some capacity. For this reason, I suggest that when extremely overpowered (repeatedly capsizing or completely luffing), you try raising your centerboard a bit. If you look at the diagram, you can see that as the length of the centerboard is reduced, you allow the boat to slip sideways more, but at the same time, you’re reducing the rotational torque that it’s causing on the boat by reducing both its lever arm and area. This allows the boat to slip sideways more but also reduces the leverage and reduces the heeling “force.” Although you may immediately argue that this is hurtful to your ability to get upwind, it allows you to trim your sails as opposed to luffing. When your sails are luffing, the only force on them is to leeward. However, once your sails are trimmed and have some proper shape, you have a driving force forward. For this reason, it is best to trim your sails to your course, then trim your weight and centerboard to match each other in their torque (rolling force) on the boat. As the boat increases in speed, your centerboard will create lift, which will “lift” you to windward. This lift is proportional to your speed, so as your boat speed increases, your leeway will reduce dramatically. This is much preferred over the scenario where the overpowered boat drifts sideways and you can’t sheet the sails without risk of immediate capsize. 

In other words, if we focus on the rotation portion, the torque counteracting the wind and water comes from the crew weight (or the lead at the bottom of the keel in a keelboat). Torque is force multiplied by length, so getting your weight out of the boat more, such as being on the trapeze or hiking, benefits your righting moment dramatically. This is part of the reason sails are lowered when it’s windy, it reduces the heeling force (torque) on the boat. Likewise, you can do this by lifting your centerboard to “reef” your centerboard. This, like a reefing a sail, both reduces the area as well as the length over which this force is acting.

Another important thing that isn’t often mentioned around the club is the region around a beam reach that opens up in (very) high winds, which is affectionately called the zone of death (ZOD). The ZOD arises when it’s too windy to keep the boat upright with all your weight utilized to its limit on a reach. This is basically when you find yourself completely overpowered. In any case, the existence of the ZOD means that you are now limited to only upwind and downwind sailing and not too much in between. This is a result of a beam reach being your fastest and most powered up point of sail. When you’re sailing in winds with the ZOD, your next biggest concern, other than staying upright when sailing in a straight line, is getting between up- and downwind courses. To do this, you must make a smooth and decisive maneuver to bear away. It’s helpful to have your weight toward the back of the boat and have pre-eased the jib. Once downwind on a broad reach, you can relax a bit and steer for heel with the main eased a few feet off the aft quarter and ease in the gusts. The most important thing when sailing in these conditions is to keep the boat moving and flat. Once you have leeward heel, you will likely round up and broach, leading to your next chance to master the bear away. 

Continue reading
  10220 Hits

Demystifying Apparent Wind - Part 2

b2ap3_thumbnail_Apparent-Wind-Puff---Close-Hauled.jpg

Last time, we looked at apparent wind and how it changes as you change point of sail. In that discussion, the speed and direction of the true wind was the same and the boat direction changed. Here we look at what happens when you're keeping the boat course the same, the wind direction doesn't change, but the wind speed does. It increases (a puff) or it decreases (a lull). You get both of these as you're traversing the Novice Area on a normal day (westerly winds), as the trees and gaps between them on the breakwater to the restaurant cause this uneven wind.

Again, we're using our Bahia-like dinghy and a 5 kt. wind. You're sailing close-hauled, so it looks like this:

The boat is 45 degrees to the true wind, but only 30 degrees to the apparent wind. Normal. Then you get a puff, say a pretty big one (10 knots, double the speed but out of the same direction). In that instant, your boat speed doesn't change (it needs time to do that), but your apparent wind does. It looks like this:

Continue reading
  10578 Hits

Demystifying Apparent Wind - Part 1

b2ap3_thumbnail_Apparent-Wind---Close-Hauled.jpg

A very common problem my students have voiced is that they have trouble figuring out where the wind's coming from. On the one hand, it shouldn't be so hard - turn your head and feel the wind on your ears. When it's the same on both ears, you're either looking straight into the wind or straight away from it. Or (less accurate) look at the yarn on the side stay.

Yet it's not so simple. You think of the wind as coming from the same direction, but when you sail, it doesn't seem to do that. It seems to shift a lot. And "you told me we couldn't sail higher than about 45 degrees into the wind, but that yarn on the stay has a much smaller angle than that". And (yet more observent) "We're sideways to the waves, so we should be on a beam reach, but the yarn says we're still somewhat upwind".

Welcome to the world of apparent wind. This is a simple concept to explain and  understand at a high level, but very hard to get at a detailed level. Everyone gets the simple explanation - you're peddling a bike at 10 knots on a calm day, what do you feel? A 10 knot headwind. The speed you're generating adds to the wind speed to create the wind you feel, the apparent wind. The apparent wind is what you and the bike feel. Peddaling 10 knots in a 10 knot headwind, and you're pumping against a 20 knot apparent wind. Doing the same in a 10 knot tail wind, and Bob's very much your uncle.

Those with a math background easily grasp that this is a vector algebra problem - the boat wind speed adds up with the true wind speed as vectors, where both the speeds and the directions interact. But even if you get that, it's truly hard to see how it all plays out on the water. And I'm speaking as someone with a graduate education in mathematics. In editing this blog, I realized that I had messed up a calculation in my first draft. If you sit down to do the calculations, you have to determine what your boat speed will be at a given true wind speed and point of sail (angle of the boat to the wind). Polar performance diagrams will show this, but good luck finding these for any of our dinghy's.

So my point is that it's quite difficult to build a mental model of this. Instead, you can get a feel of how it happens on the water without trying to understand why, exactly. I did the math from a guess of a polar diagram for a boat similar to a Laser Bahia at 5 knots wind. If you're not racing, it doesn't matter how accurate this is. But it should be pretty typical.

Continue reading
  26912 Hits

Cruising above the 49th Parallel

b2ap3_thumbnail_track.png

Over the past several years, CSC has organized a number of epic dinghy cruises: to Angel Island (with camping!), out under the Golden Gate Bridge, and to China Camp, just to name a few. Although I've missed out on most of these, I recently got to take part in something equally awesome: a three-day cruise from Vancouver to Keats Island, organized by the UBC Sailing Club.

Keats Island lies northwest of Vancouver along British Columbia's Sunshine Coast, about 13 nautical miles from Jericho Sailing Center, where UBC Sailing houses its boats. The island is home to Plumper Cover Provincial Park, which sports a beautiful campground, and is only accessible by boat.  The route there from Jericho involves sailing out from the English Bay into relatively open waters in the Straight of Georgia, before passing through a channel north towards Keats.


Our fleet left Vancouver on the morning of Saturday, August 1st, and consisted of seven Vanguards, two Hobie 16s, two F18 catamarans, and one RS500. We had a chase fleet consisting of a larger powerboat, a Boston Whaler, and a small Zodiac. Most of our gear, as well a number of participants not lucky enough to get a sailing spot, got transported to Keats on a water taxi. All told, we had about 40 participants. Since Plumper Cove doesn't allow campsite reservations, we had shipped a number of tents and a few brave campers over several days earlier to stake out our spot. The first Monday in August is a holiday in British Columbia, so we needed to ensure that we had somewhere to camp.

Continue reading
  7348 Hits

Right-of-Way Trivia

b2ap3_thumbnail_Backwards-Right-of-Way_20150608-035246_1.jpg

I love trivia. Probably my age, or my geek background.

When I go over right-of-way rules with students, I tell them this is a trick question. Sailboat and kayak - who has right of way? Any answer they give is wrong, although it's interesting to see the reasoning behind it (kayak more maneuverable, etc.), and that in itself is useful - on the water, what would you do?. The answer is that it's not covered in the Naviagation Rules. Really. I was a kayaking instructor for 10 years, and in a moment of boredom, I read the entire Navigation Rules looking for things that applied to kayaks. Exactly one reference:

Rule 25 - Sailing Vessels Underway and Vessels Under Oars 

(ii) A vessel under oars may exhibit the lights prescribed in this rule for sailing vessels, but if she does not, she shall exhibit an all around white light or have ready at hand an electric torch or lighted lantern showing a white light which shall be exhibited in sufficient time to prevent collision.

Not useful for right-of-way. O course the generic any vessel rules apply to a kayak (sailboat overtaking a kayak, or for that matter a slow moving powerboat, must give way).

Continue reading
  11579 Hits

Docking in Low Tide

b2ap3_thumbnail_Low-Tide-Docking.jpg

I posted while ago on launching in low tides. The idea was close attention to sail trim. The common mistake is to over-sheet the main leaving the dock, and even with full centerboard you'll drift sideways into the Cal Adventures dock.

Here I want to talk about docking in low tide. 

There are several problems. One is recognizing that it's low tide. It's easy going out with a "fresh" boat (you push the centerboard/rudder down and feel the mud, so you bring it up a few inches). But coming back you have to recognize and plan it. My rule of thumb for Bahias is that a tide of under +2.0 means you have to raise the centerboard and/or rudder. Plan for it, and raise both on the way in. When it's all the way down, the centerboard is about a foot lower than the rudder fully down, so you can adjust the two differently.  In very low tides, the rudder will be just below the water, horizontal. It will work, but it will be very  hard to use, and hard to turn quickly. Also, the stress on the rudder when it's parallel to the water surface is in a direction it's not designed for. So it's best to limit the amount of time you sail with the rudder in that position.

You will find that the boat handles differently with the centerboard up (or raised above the normal, fully down position). An important thing in docking is that the pivot point of the boat is farther aft, which means that where the boat actually turns in the water will also be farther aft.

The dock approach will be different in low tides. You can't use the standard "come in on a beam reach and slow sail to the dock". Your leeway with the centerboard up will be too much. Even if you aim for the south end of the dock, you'll be lucky not to hit the sea-wall (painful personal lesson here).

Continue reading
  10122 Hits

Advanced Boat Handling - Another Great Advanced Dinghy Lesson

The Advanced Dinghy lessons this year have been uniformly great.

This week's was no exception - boat handling by Jonas Kellner, a club member who's been sailing for over 30 years and teaching sailing and racing for almost as long.

Someone asked Jonas before the class whether he'd be teaching racing tactics. He said that he could, but knowing the best tactic for a given situation is useless if you can't execute the maneuver. He'd be focusing on the latter.

We had a pre-sail briefing, where Jonas explained what we'd be doing. 8 exercises around a set of buoys in a line perpendicular to the wind (so basically beam reach). The first and last exercises were slalom course, where we were to keep as tight to each buoy as we could.

The intermediate exercises were ovals around the set of buoys (counter-clockwise in all cases). They were technical exercises, designed to improve boat handling skills:

Continue reading
  8615 Hits

Downwind sailing and the evils of rounding up

One of the common pitfalls of sailing a dinghy downwind is that in a sudden gust, the boat will start to head up, leading to a capsize. In this blog post, I'd like to share some of my thoughts on the factors in play and how to best deal with them. This discussion applies to sailing with just main and jib, as well as to those thrill-seekers using a gennaker.
 
To begin with, why does your dinghy insist on heading up in a gust? There are (at least) two factors involved. To begin with, your dinghy typically has a bit of weather helm: to get technical, the center of effort (COE) on your sails lies slightly behind the center of lateral resistance (CLR) created by your dinghy's foils. In normal conditions, a bit of weather helm makes for a nice responsive tiller that helps you to better "feel" the boat and the wind. However, as the force on the sails increases as happens during a gust, the discrepancy between the COE and CLR is amplified, causing more and more weather helm. This effect will cause your boat to want to head up more strongly during a gust.
 
However, the natural weather helm caused by the discrepancy between COE and CLR isn't typically what will cause you problems. Instead, it is the additional weather helm caused by excessive heeling. Indeed, as the boat heels more, the hull's interaction with the water creates extra weather helm. Furthermore, your rudder is now only partially submerged, giving you less control over rounding up. And that is just the beginning: assuming that you are sailing below a beam reach, the more the boat rounds up, the more the heeling force on the sails increase. This causes more rounding up, which causes more heeling which causes... you can see that this will probably end with you getting wet.
 
Now that we know two of the main factors in play, let's consider three different scenarios.
  • First scenario: you're sailing on a dead run when a gust hits. The force of the wind on the main will indeed cause the boat to want to round up a bit. However, since you're on a run, it won't cause much heeling, so you only have the first aforementioned factor to deal with.
  • Second scenario: you're on a broad reach when a gust hits. Now you're in trouble -- you have both excessive weather helm coming from the force on the main, as well as weather helm caused by heeling. As you round up towards a beam reach, you can't depower the main, and you may end up capsizing.
  • Third scenario: you're on a beam reach when the gust hits. Again, both factors will apply, but as the boat rounds up above a beam, the main will start to depower, reducing heeling and weather helm and saving your bacon.
From the above analysis, we see that the danger of rounding up and capsizing is greatest when sailing close to a broad reach. But never fear: we have some powerful weapons at hand in combating the evil demon of weather helm.
 
First, we would like to be able to depower the main sail while sailing on a broad reach; this will decrease both natural weather helm and excessive heeling. Our first weapon for doing this is the vang or gnav. Easing this control in a gust lets the top portion of the sail twist away from the wind. While crewing for one of our club's most experienced dinghy sailors during the infamous Fast Track squall of May '12, my skipper had me blowing the gnav in every gust, and this is what let us limp back to the club in (more or less) once piece.
 
Our second weapon in depowering the main is of course the main sheet. If the wind is howling 20 knots and your Bahia is screaming along on a broad reach, chances are that your high boat speed is shifting the apparent wind far enough forwards that your main sheet should not be all the way out. The added bonus is that when the gust comes, you can now ease the sheet to help balance the boat and depower the main. If you instead neglected to sheet your mainsail in at all, you can't depower  by easing the main! 
 
Apart from depowering the main sail, the above analysis tells us that we want to do everything possible to keep the boat flat. Anticipating the gusts and aggressively falling off is key. Likewise, hard, aggressive hiking (or even sending crew out on the wire) are also important. Keep in mind, though, that if you are already hiking out hard before the gust hits, you won't be able to up the ante when you need to. Just as with the main sheet, it is highly advantageous to have a bit of room to make adjustment during gusts. Finally, aggressively sheeting in the jib (or gennaker) in gusts so that it stalls a bit will shift the COE forward in the boat, which will also decrease weather helm. Likewise, raking the centerboard aft slightly will shift CLR aft, also decreasing weather helm.

  15507 Hits

Advanced Dinghy Lessons Start with a Bang!

Philippe on the subject of sail trimming and especially use of the gnav (according to him, an under-used tool).

Philippe is an an incredible sailor and an amazing instructor.  We spent about half of the time on land with an RS Venture looking how the various sail controls affected sail shape and talking about what sail shape you want for what conditions (it was blowing over 15 kt. this evening, by the way, with pretty big seas - we  had a lot of weight on the boat on land to make sure it didn't capsize into the cars parked near the clubhouse). On land, it was much easier to see the effects of various controls on the sail shape.

This is my lesson summary (feel free to comment):

Scope: Dinghies which generally don't have travelers.

  1. Sail shape is very important. The usual things about depth and power, and location of sail draft. With lighter winds, you want a fuller sail and a draft a bit aft. With heavier winds, you want a tighter sail and a draft forward.
  2. In heavier seas, you want more power, even with stronger winds.
  3. Tensioning the Cunningham brings the draft forward.
  4. The outhall affects the lower third of the sail.
  5. Several controls bend the mast aft, which tighten the sail and move the draft forward. Tightening the mainsheet and the gnav do this.
  6. In high winds, you don't want the boom near the center of the boat, as the lift from the sail is mostly sideways to the boat. But just easing the mainsheet induces twist in the sail. Tightening the gnav overcomes this, allowing the mainsail to go to a better angle, but preserving the sail tightness.
  7. Bearing off from close-hauled, you want to do several things.  One is ease the mainsheet. Another is to keep weight on the windward side to help turn the boat downwind. A third is to ease the gnav (and then tighten it when on course).
  8. Gybe-ing:
    1. Blow the gnav before the gybe (this will depower the sail and cause the top of the sail to back-wind before the bottom of the sail, producing a gentler gybe).
    2. Weight the boat to windward to turn it down-wind through the wind. If you reach across to pull the boom across, you'll mess this up.
    3. If done correctly, the wind will gently pull the mainsail across. Grab the sheets as this happens to buffer it.
    4. Power up after the gybe by tightening the gnav

Then we went out and did it, both upwind and downwind. And it worked. I was prepared for hikiing really far out with the winds we had, but we didn't have to. And it was amazing how gentle the gybes were with this technique. Note that in bearing off and gbye-ing, you're doing what you would do rudder-less - moving weight to turn the boat. After the class, I discussed that with Philippe, and  his opinion (as a racer of some renown) is that the more you can use your weight to  maneuver the boat, the better (i.e. faster) you'll sail.

Continue reading
  7926 Hits